Cozy Granny Square Crochet Sweater – Free Pattern & Video Tutorial
There is something special about wearing a sweater you made with your own hands. Each stitch adds character, and every granny square gives you a chance to play with colors and textures. If you love cozy handmade clothing, a Granny Square Crochet Sweater is a beautiful project to add to your wardrobe.
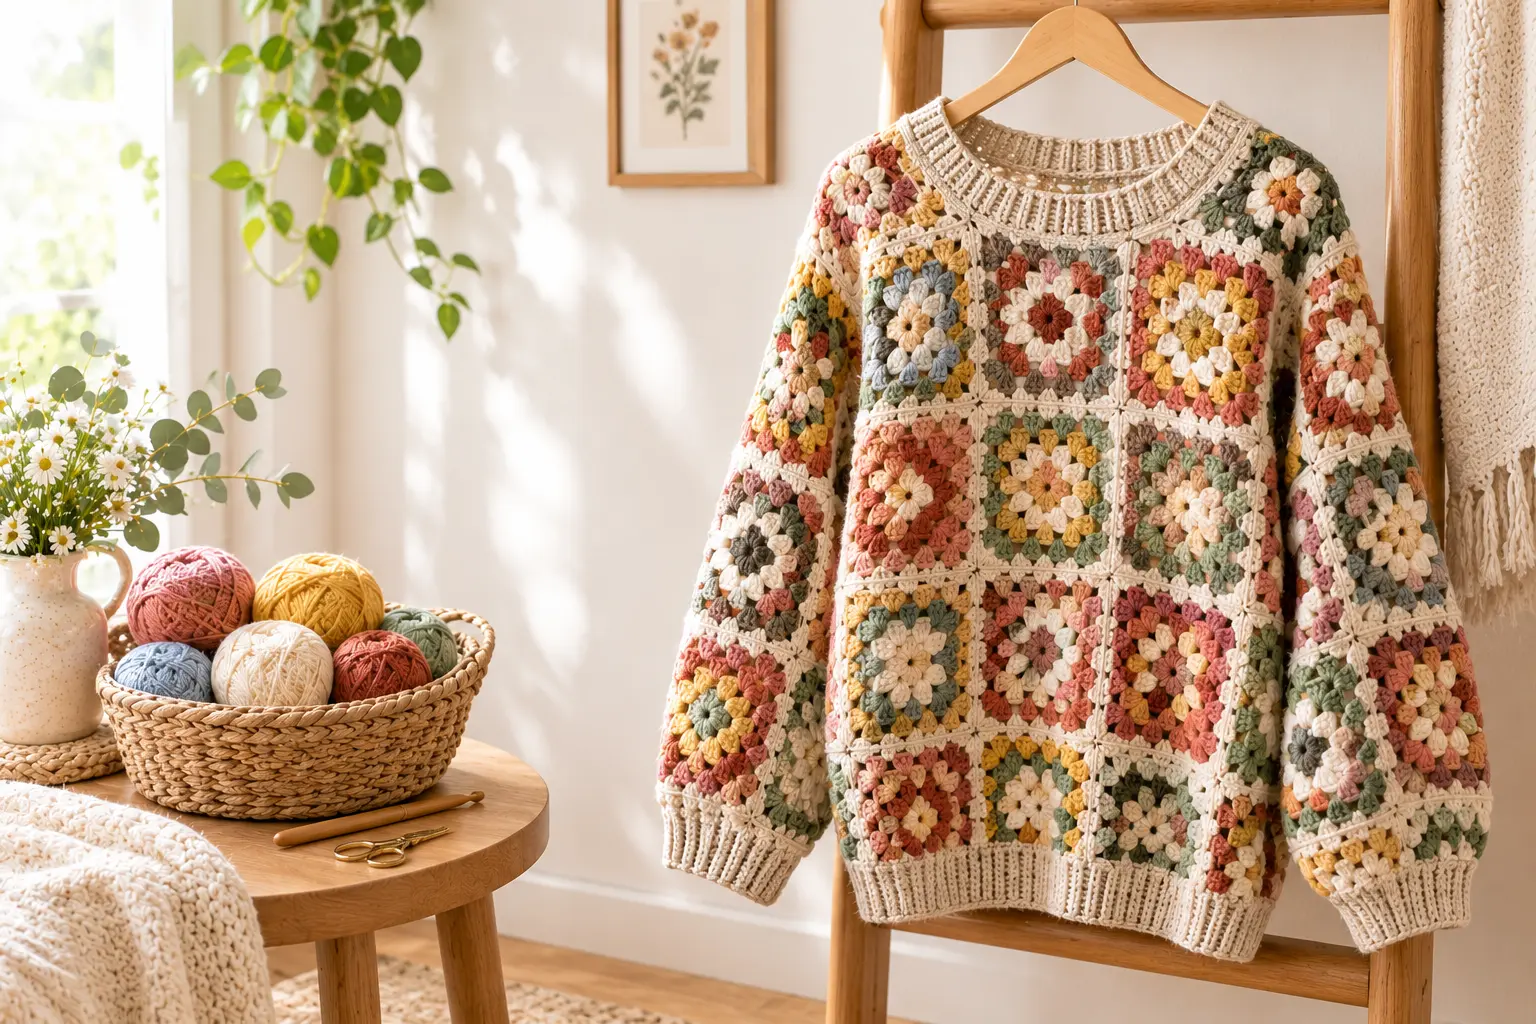
This classic crochet design combines the charm of traditional granny squares with the comfort of a wearable sweater. You can choose soft neutrals for a timeless look or mix colorful squares for a vintage-inspired style. With the right yarn, a little patience, and a clear set of instructions, you can create a sweater that reflects your personality.
In this guide, you’ll discover the materials you need, how to crochet granny squares, how to assemble your sweater, and tips for achieving a comfortable fit. Let’s get started!
Why You’ll Love This Granny Square Crochet Sweater
A granny square sweater is a wonderful way to turn simple crochet motifs into something practical and stylish. The individual squares make the project manageable, while the finished garment offers plenty of room for creativity.
Here are a few reasons to try this project:
- Timeless design: Granny squares create a classic handmade look that never feels ordinary.
- Customizable colors: Combine your favorite shades to create a unique sweater.
- Creative and relaxing: Crocheting individual squares lets you work in smaller, satisfying stages.
- Personalized fit: Adjust the dimensions to suit your preferred style when the construction allows.
- Great for gifting: A handmade sweater can be a thoughtful present for someone special.
Whether you prefer an oversized fit or a more traditional silhouette, you can adapt the look to suit your wardrobe.
Materials and Supplies for Your Crochet Sweater
Before you begin, gather your materials. Choosing compatible yarn and a suitable hook will help your granny squares remain consistent in size.
Materials Table
| Material | Quantity | Purpose |
|---|---|---|
| Main-color yarn | According to your size and design | Joining, edging, or solid sections |
| Contrasting yarn | As needed | Creating colorful granny squares |
| Crochet hook | Size recommended for your yarn and gauge | Working the stitches |
| Tapestry needle | 1 | Joining squares and weaving in ends |
| Scissors | 1 pair | Cutting yarn |
| Measuring tape | 1 | Checking square and sweater dimensions |
| Stitch markers | Optional | Marking assembly points |
The exact yarn quantity and hook size depend on your chosen pattern, finished size, and gauge. Check your yarn label and make a test square before purchasing all your supplies.
Choosing the Best Yarn
For a cozy granny square sweater, choose a yarn that feels comfortable against your skin and has enough drape to create a wearable fabric. Acrylic yarn can be practical and easy to care for, while wool blends may provide additional warmth. Cotton blends can work well for lighter designs.
Choose colors before you begin. Cream, beige, and brown create a classic appearance, while dusty pink, lavender, sage green, and baby blue offer a softer look. For a bold, retro-inspired sweater, experiment with contrasting colors.
Crochet Stitches You’ll Need
Most traditional granny squares use a small collection of basic crochet stitches. If you’re new to crochet, practice these techniques before making the full sweater.
| Abbreviation | Meaning |
|---|---|
| ch | Chain |
| sl st | Slip stitch |
| dc | Double crochet |
| st | Stitch |
| sp | Space |
| rep | Repeat |
The granny square commonly features groups of three double crochet stitches worked into the same space. Chain spaces between groups help create the familiar open texture.
Keep your tension consistent and count your stitch groups regularly. These small habits will make joining your squares much easier later.
Free Granny Square Crochet Sweater Pattern
This beginner-friendly guide uses individual granny squares joined into sweater panels. The precise square count, dimensions, and sleeve construction should follow your chosen size and tested pattern.
Step 1: Crochet Your First Granny Square
Begin with the starting method specified in your pattern, such as a magic ring or a small chain loop.
Work the first round of crochet clusters into the center. Create the corners using the required chain spaces, then continue with additional rounds until the square reaches the intended size.
Check that your square lies flat. If it curls or becomes too tight, review your stitch count and tension before continuing.
Step 2: Make the Remaining Squares
Repeat the same square pattern until you have enough motifs for your sweater.
For consistent results:
- Use the same hook throughout.
- Maintain even stitch tension.
- Count rounds carefully.
- Measure squares periodically.
- Weave in loose ends as you go.
If you’re using multiple colors, arrange the squares on a flat surface before joining them. This lets you experiment with the layout and balance the shades.
Step 3: Block Your Granny Squares
Blocking can help your squares achieve more consistent dimensions, depending on the yarn and construction.
Follow the yarn’s care instructions and test your preferred method on a sample first. Shape each square gently and allow it to dry completely before assembly.
Avoid applying heat or moisture in a way that could damage the fiber.
Step 4: Arrange and Join the Squares
Lay your squares out according to the sweater’s construction diagram. Check the orientation and color placement before joining anything.
Use the joining technique specified in your pattern, such as a slip-stitch join or a sewn seam. Keep the joins even without pulling them too tightly.
Accurate joining helps your sweater hang neatly and reduces unwanted gaps or bulky seams.
Step 5: Assemble the Sweater Body
Join the squares into the front and back sections, following your pattern’s layout.
Form the shoulder seams and leave the required neckline opening. Before completing the assembly, compare the dimensions with your intended size.
Try the partially assembled sweater on when practical, or hold the panels against your body to check the width and length.
Step 6: Make and Attach the Sleeves
Follow the pattern’s sleeve instructions, whether the sleeves are made from additional granny squares or worked as separate pieces.
Check that both sleeves match in length and width. Attach them evenly to the body, making sure the armholes allow comfortable movement.
Step 7: Finish the Neckline, Cuffs, and Hem
Work the specified edging or ribbing around the neckline, cuffs, and lower edge.
Keep the tension consistent so the finishing rows don’t pull the sweater out of shape. Weave in all remaining yarn ends and inspect the seams.
Once everything is secure, your handmade granny square sweater is ready for a final fit check.
Granny Square Crochet Sweater Video Tutorial
A video tutorial can make unfamiliar techniques easier to understand, especially when you’re learning to join squares or assemble a garment.
Choose a tutorial that matches the stitch pattern and construction method you’re using. Ideally, it should demonstrate:
- How to crochet a granny square.
- How to repeat the square’s rounds.
- How to change colors.
- How to join the motifs.
- How to assemble the body and sleeves.
- How to finish the neckline and edges.
Video tutorial: Embed your matching video here or link to the original tutorial. Check that the written instructions and video demonstrate the same method.
For the best results, pause the video whenever you need more time and compare your work with the demonstration before moving to the next step.
Sizing and Fit Tips for Your Granny Square Sweater
A beautiful sweater should feel as comfortable as it looks. Before starting, measure your bust or chest, desired body length, and sleeve length.
Compare your measurements with the finished garment measurements in your pattern. Remember that a sweater’s finished dimensions are not necessarily the same as your body measurements; the amount of ease affects the final fit.
To customize your sweater:
- For a longer fit: Add length where the construction permits.
- For an oversized look: Choose a suitable larger size or adjust the panel dimensions.
- For shorter sleeves: Adjust their length before completing the cuffs.
- For consistent squares: Make a gauge swatch and check dimensions regularly.
Any modification may affect the amount of yarn required, so plan your supplies accordingly.
Common Granny Square Sweater Problems and Solutions
Why Are My Granny Squares Curling?
Curling can result from tight tension, incorrect stitch counts, or a hook that produces a fabric that is too dense. Check your corners and stitch pattern first. Blocking may help if the yarn is suitable, but it won’t fix every underlying problem.
Why Don’t My Squares Match in Size?
Differences in tension or round counts can make squares uneven. Use the same hook and yarn throughout, count rounds carefully, and measure the squares before joining them.
How Can I Make My Seams Neater?
Align the squares carefully and use the same joining method throughout the garment. Keep your joining tension even and weave in the ends securely without creating bulky areas.
How to Care for Your Handmade Crochet Sweater
Your finished sweater deserves gentle care. Always follow the washing instructions for your yarn, as different fibers respond differently to water, heat, and agitation.
- Wash according to the yarn label.
- Avoid excessive heat when the fiber is sensitive.
- Reshape the sweater gently after washing if necessary.
- Dry flat when recommended.
- Store folded if hanging could stretch the fabric.
These simple habits can help preserve your sweater’s shape and texture.
Frequently Asked Questions
Is a Granny Square Crochet Sweater Suitable for Beginners?
Yes, it can be a manageable project if you know basic crochet stitches. Making the squares is often straightforward, although joining and assembling the sweater may require extra practice.
How Many Granny Squares Do I Need for a Crochet Sweater?
The number depends on the pattern, square size, garment dimensions, and sleeve design. Follow the pattern’s layout and size chart rather than relying on a generic square count.
What Yarn Is Best for a Granny Square Crochet Sweater?
Choose yarn that feels comfortable against your skin and creates the desired warmth and drape. Acrylic, wool blends, and cotton blends may all be suitable, depending on the design.
Can I Make an Oversized Granny Square Sweater?
Yes. You can choose a larger size or adjust the dimensions when the construction allows. Check your measurements and yarn requirements before making changes.
Do I Need to Block Granny Squares Before Joining Them?
Blocking can help make squares more uniform, but whether it’s necessary depends on the yarn and pattern. Test your method on a sample and follow the fiber’s care instructions.
Conclusion: Create a Sweater That’s Uniquely Yours
A Granny Square Crochet Sweater brings together classic crochet texture, comfortable style, and endless color possibilities. By taking your time with the squares, checking their dimensions, and joining them carefully, you can create a handmade garment that reflects your own creativity.
Choose your favorite yarn colors, prepare your hook, and enjoy the process one square at a time.
Ready to start crocheting? Save this pattern to Pinterest, gather your supplies, and share your favorite granny square color combinations in the comments. I’d love to hear what your finished sweater will look like!