Easy Crochet Bucket Sun Hat – Free Pattern & Video Tutorial
Looking for a fun crochet project that combines style, comfort, and practicality? An easy crochet bucket sun hat is a lovely addition to your handmade wardrobe. Whether you’re planning a beach trip, enjoying a sunny afternoon in the garden, or searching for a thoughtful handmade gift, this classic hat is both useful and fashionable.
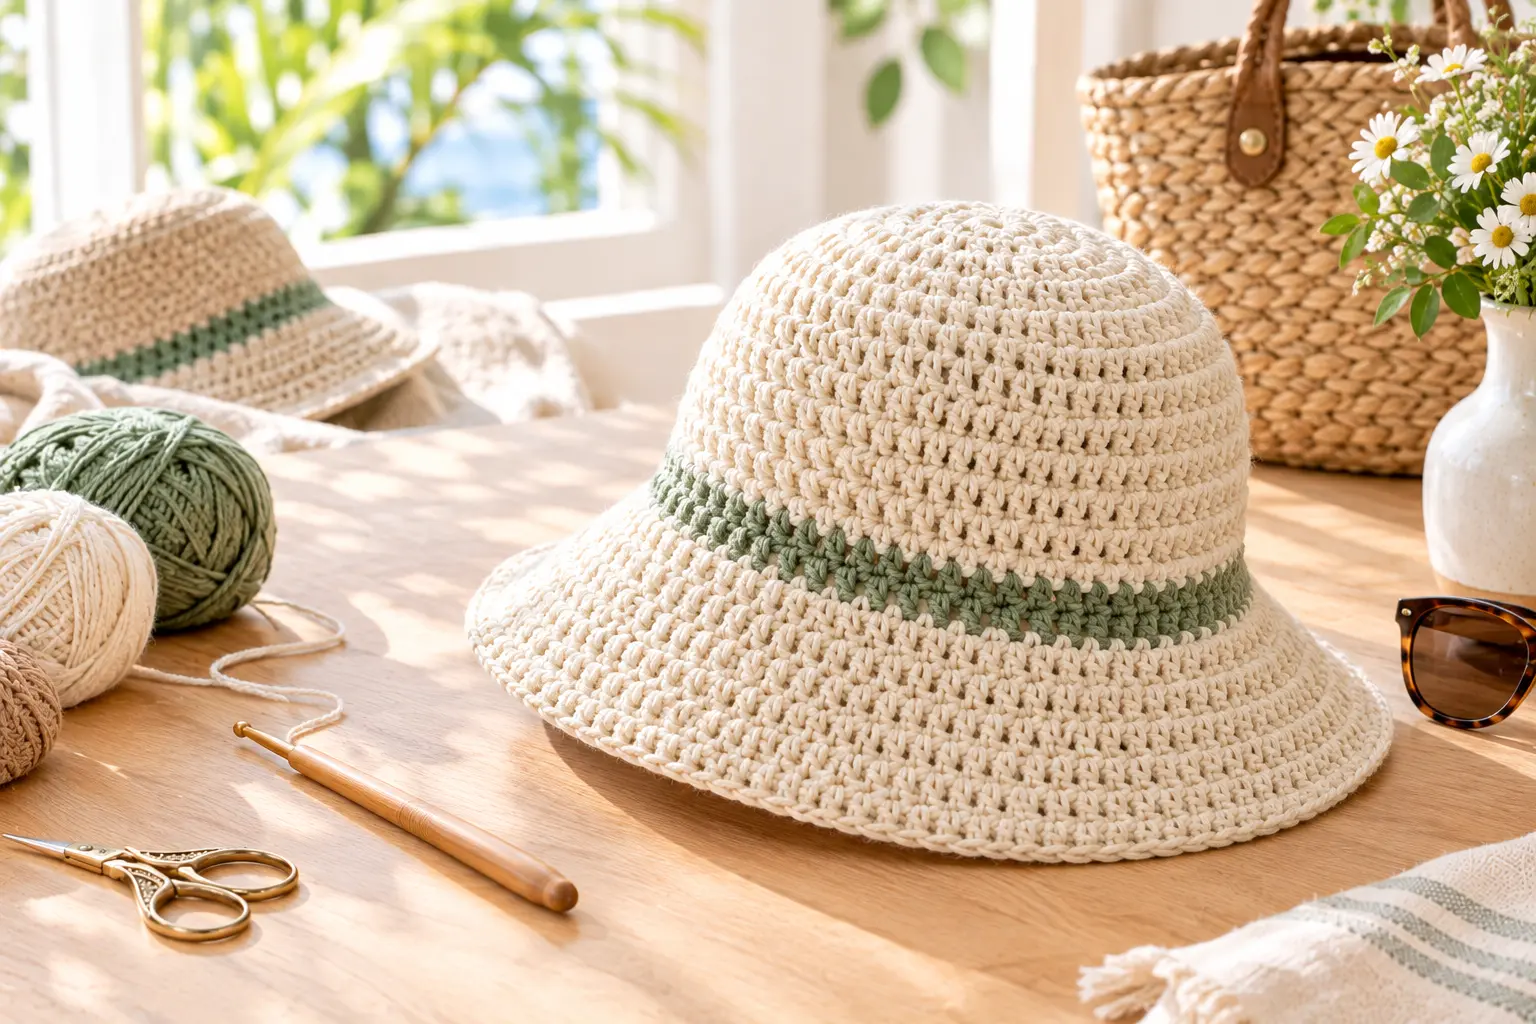
With its rounded crown, comfortable sides, and wide brim, a crochet bucket sun hat offers a relaxed look that works well with casual summer outfits. You can choose your favorite yarn color, experiment with different textures, and adjust the fit to suit your style.
In this guide, you’ll learn about the materials, basic stitches, construction, and finishing techniques you need to make your own hat. Follow along with the free pattern instructions and video tutorial when available, and enjoy creating a handmade accessory you’ll want to wear all summer.
Why You’ll Love This Crochet Bucket Sun Hat
A crochet bucket sun hat is a rewarding project because you can customize nearly every detail. Even if you’re still developing your crochet skills, the basic construction is approachable once you understand how to work in rounds.
Here are a few reasons to try this pattern:
- Beginner-friendly construction: Build the hat from a simple crown, sides, and brim.
- Customizable design: Choose solid colors, stripes, or decorative details.
- Practical summer accessory: Pair it with dresses, shorts, beachwear, or everyday outfits.
- Great handmade gift: Make a personalized hat for a friend or family member.
- Creative freedom: Adjust the brim width and color combination to create your preferred look.
If you’re looking for a crochet project that is both useful and enjoyable, this bucket sun hat is a wonderful place to start.
Crochet Bucket Sun Hat Pattern Overview
Before you begin, review the pattern information and gather your supplies. Having everything ready makes the crocheting process easier and helps you maintain consistent stitches.
| Pattern Detail | Information |
|---|---|
| Project | Crochet bucket sun hat |
| Skill level | Beginner to confident beginner |
| Construction | Crown, sides, and brim |
| Technique | Working in rounds |
| Style | Casual summer accessory |
| Customization | Colors, size, brim width, and edging |
| Pattern format | Written instructions and video tutorial, if provided |
Important: Your finished hat’s size and shape depend on the actual stitch counts, yarn, hook size, and gauge specified in the tested pattern. Use those details rather than guessing when you want a reliable fit.
Materials You’ll Need
Gather these crochet supplies before starting your bucket sun hat.
| Material | Purpose |
|---|---|
| Cotton or cotton-blend yarn | Creates a breathable fabric suitable for warm weather |
| Crochet hook | Use the size recommended by your pattern and yarn label |
| Stitch marker | Marks the beginning of each round |
| Scissors | Cuts the yarn neatly |
| Tapestry needle | Weaves in loose ends |
| Measuring tape | Checks your head measurement and finished dimensions |
| Optional decorative details | Add a ribbon, contrasting edging, or small embellishment |
Choosing the Best Yarn
For a summer hat, cotton yarn is a popular choice because it is breathable and generally holds its shape well. A cotton-blend yarn may also work if you prefer a softer feel.
Choose a yarn that creates a fabric with enough structure to support the brim. If your stitches are too loose, the hat may feel floppy. If they’re too tight, the fabric may become stiff and uncomfortable.
Before you begin, check the yarn label for its recommended hook size and care instructions. If you plan to wear your hat frequently, choose a yarn that is easy to clean and suitable for warm-weather use.
Stitches and Techniques to Know
Most basic crochet bucket hats use familiar stitches and simple increases. Your specific pattern may use different techniques, so check its abbreviations before you begin.
Common stitches include:
- Magic ring: Creates a closed center for the crown.
- Single crochet (sc): Produces a compact fabric with a neat texture.
- Half double crochet (hdc): Adds a little height while maintaining a relatively dense fabric.
- Slip stitch (sl st): Joins rounds or helps finish an edge.
- Increase (inc): Adds stitches to expand the crown or shape the brim.
You may also need to work in continuous rounds or joined rounds. Continuous rounds create a spiral, while joined rounds are closed at the end of each round. Follow one method consistently according to your pattern.
How to Crochet a Bucket Sun Hat
The basic construction has three main parts: the crown, the sides, and the brim. Follow your tested pattern for exact stitch counts and round-by-round instructions.
Step 1: Measure Your Head
Use a measuring tape to measure around the widest part of your head, usually just above your eyebrows and ears. Compare this measurement with the finished hat size in your pattern.
Remember that yarn and stitch choice affect the final fit. A small gauge swatch can help you determine whether your stitches match the pattern’s recommended gauge.
Step 2: Crochet the Crown
Begin at the top of the hat, usually with a magic ring. Work the required stitches into the ring, then increase at the intervals specified in the pattern.
As the crown grows, lay it flat occasionally to check its shape. It should expand evenly rather than curling sharply or developing unwanted ripples.
If the crown cups too early, you may need more increases. If it becomes wavy, there may be too many. Check your stitch count and compare your work with the pattern before making adjustments.
Step 3: Work the Sides
Once the crown reaches the required diameter, continue crocheting without the crown increases, following the pattern instructions. This creates the sides of your bucket hat.
Try to maintain even tension throughout each round. Place a stitch marker at the beginning of the round if needed, and count your stitches regularly to prevent accidental increases or decreases.
Continue until the sides reach your preferred depth or the measurement specified in the pattern.
Step 4: Shape the Brim
The brim gives your crochet bucket sun hat its recognizable silhouette. Follow the pattern’s increase sequence to expand the fabric outward.
For a more structured finish, keep your stitches consistent and avoid changing hook sizes unless the instructions recommend it. A wider brim creates a more dramatic look, while a narrower brim gives the hat a simple, casual style.
Remember that a crocheted brim is not a substitute for certified sun-protective clothing. The amount of sun protection your finished hat provides depends on its coverage, yarn, stitch density, and construction.
Step 5: Finish and Weave in the Ends
Complete the final round as instructed. Fasten off the yarn, then use a tapestry needle to weave in all loose ends securely.
Check the brim for uneven edges and gently shape the hat with your hands. If your yarn permits it, follow the care label before washing or blocking the finished piece.
Watch the Crochet Bucket Sun Hat Video Tutorial
A video tutorial can be especially helpful when you’re learning to increase a crown, transition from the sides to the brim, or work in joined rounds.
Watch the complete tutorial alongside the written pattern, pausing whenever you need to inspect a stitch or repeat a technique. Try working a few rounds at a time instead of rushing through the entire project.
Publishing note: Add the actual video tutorial here before publishing this article. Make sure it demonstrates the same hat construction and stitch sequence as your written pattern.
Ways to Customize Your Crochet Bucket Sun Hat
One of the best things about making your own hat is choosing the details.
- Try neutral shades: Cream, beige, and soft brown create a timeless summer look.
- Choose cheerful colors: Yellow, coral, mint, or sky blue add a playful touch.
- Make contrasting stripes: Alternate two or three colors for a distinctive design.
- Adjust the brim: Follow the pattern’s shaping instructions to create a wider or narrower brim.
- Add a decorative edge: A contrasting final round can give your hat a polished finish.
You can also make matching hats for friends or family members. Just remember that changing yarn weight, hook size, or stitch counts may affect the finished dimensions.
Common Crochet Bucket Hat Problems and Solutions
Why is my crown curling?
Your crown may need additional increases, depending on the stitch pattern and your tension. Check the instructions and stitch count before changing anything.
Why is my brim wavy?
Too many increases can cause the brim to ripple. Review the increase sequence and make sure you haven’t accidentally added extra stitches.
Why is my hat too small?
Check your gauge and finished measurements. Your stitches may be tighter than the pattern designer’s, or you may need a different size.
How can I make my hat hold its shape?
Choose a suitable yarn, maintain consistent tension, and follow the pattern’s recommended hook size. A dense fabric can help, but the brim’s structure also depends on its shaping.
How to Care for Your Handmade Crochet Hat
Follow the care instructions on your yarn label. Many cotton crochet hats can be gently hand-washed, but blends and decorative details may require different treatment.
After washing, reshape the hat and let it dry according to the yarn’s care recommendations. Avoid hanging a wet hat if doing so could stretch the fabric, and store it somewhere dry when you’re not wearing it.
Frequently Asked Questions
Is a crochet bucket sun hat suitable for beginners?
Yes. A basic design can be suitable for beginners who know fundamental stitches and can work in rounds. A video tutorial can make the shaping steps easier to follow.
What yarn is best for a crochet bucket sun hat?
Cotton and cotton-blend yarns are popular choices for summer hats. Select a yarn that feels comfortable and creates a fabric with enough structure for your preferred design.
Can I change the size of my crochet bucket hat?
Yes, but you should use the pattern’s sizing guidance and gauge information. Adjusting the crown diameter and hat depth can affect the overall fit, so make changes carefully.
How long does it take to crochet a bucket sun hat?
The time varies according to your experience, yarn weight, stitch choice, and the complexity of the brim. A simple design may take less time than one with stripes or decorative details.
Can I make a crochet bucket hat as a gift?
Absolutely! Choose the recipient’s favorite colors and check their head measurement if possible. A handmade summer hat is a thoughtful gift for birthdays, holidays, or beach trips.
Start Your Crochet Bucket Sun Hat Today
Making an easy crochet bucket sun hat is a satisfying way to practice your crochet skills while creating a useful summer accessory. With the right materials, steady tension, and a clear pattern, you can shape a hat that reflects your personal style.
Choose your yarn, gather your hook and other supplies, and follow the written instructions alongside the video tutorial when available. Take your time with the crown and brim, and enjoy watching your project come together one round at a time.
Ready to start crocheting? Save this pattern for your next project, share it with a fellow crochet lover, and explore more beginner-friendly crochet ideas at www.crochetwhisper.com. Your next handmade favorite could be just a few stitches away!