Crochet Hook Case Free Pattern: Make Your Own Crochet Hook Organizer
The tutorial video is at the bottom of the article.👇
Have you ever reached into your project bag looking for a particular crochet hook, only to find it tangled among yarn scraps, stitch markers, and unfinished projects? If so, a handmade crochet hook case might be exactly what you need. It keeps your favorite hooks organized, makes your supplies easier to carry, and adds a personal touch to your crochet collection.
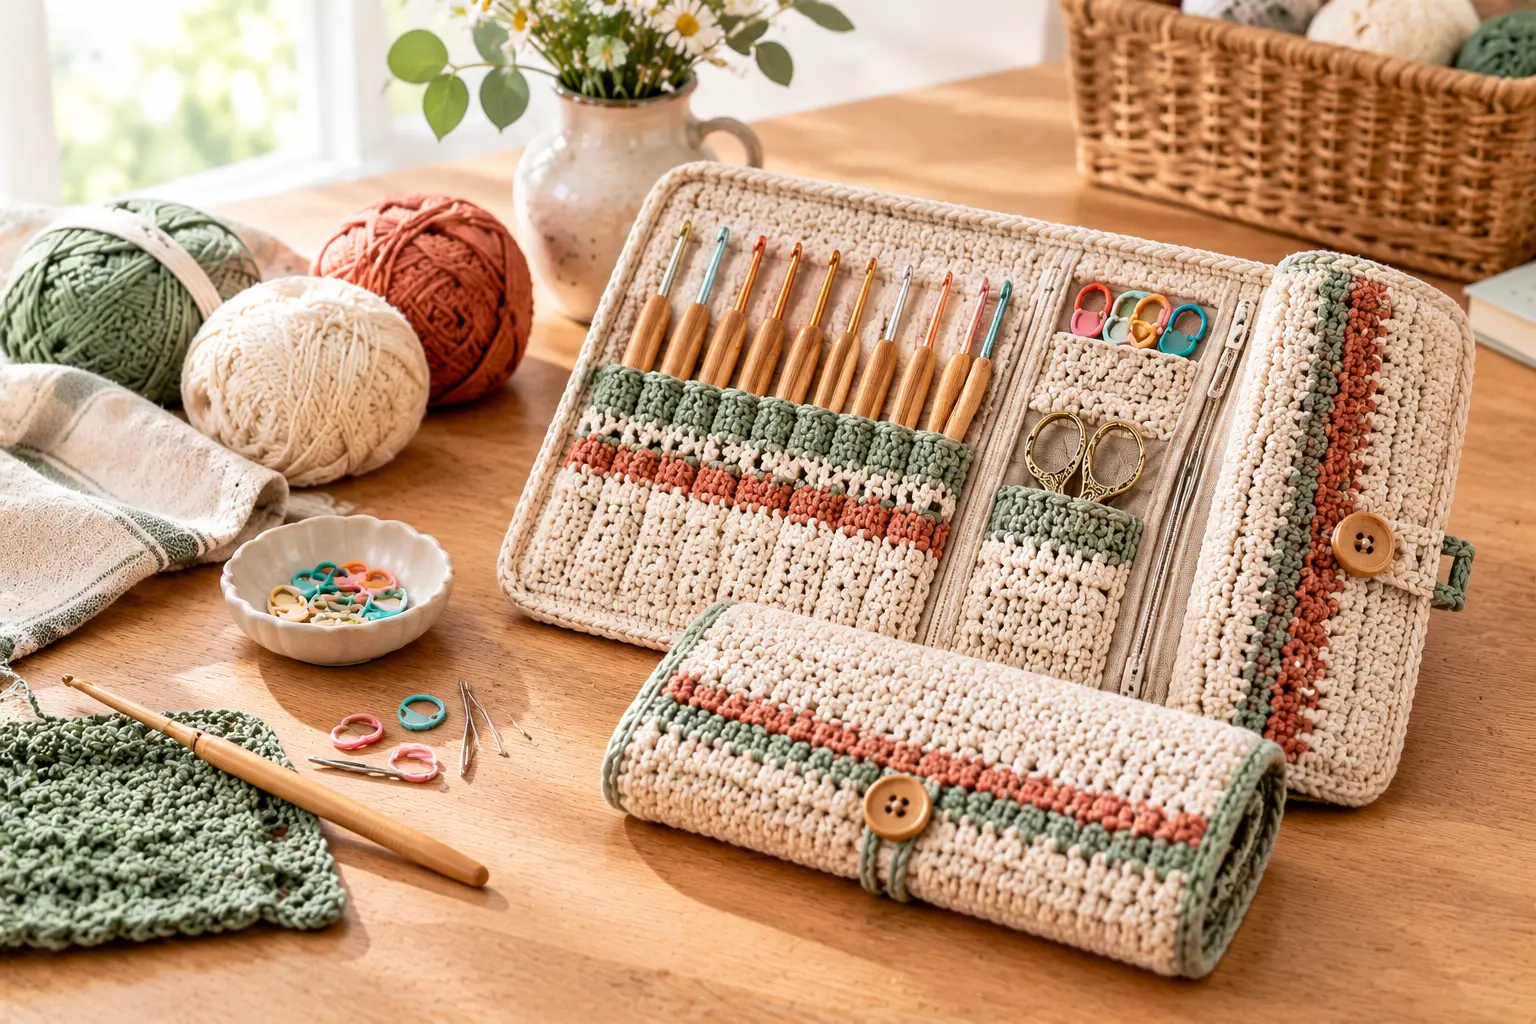
The best part is that you can customize your hook case to match your style. Choose your favorite yarn colors, create pockets for different hook sizes, and add a simple closure to keep everything secure. Whether you’re making one for yourself or as a thoughtful gift for another crocheter, this practical project is a lovely way to put your crochet skills to use.
Why You’ll Love This Crochet Hook Case Free Pattern
A crochet hook case is more than a pretty accessory. It helps you keep your tools together so you can spend less time searching and more time enjoying your projects.
Here are a few reasons to make your own:
- Stay organized: Keep crochet hooks in one convenient place.
- Protect your tools: Individual pockets help prevent hooks from rubbing against other accessories.
- Make it personal: Select colors, stitches, and details that suit your taste.
- Carry your supplies: A compact case is handy for crochet sessions away from home.
- Create a handmade gift: Pair the finished organizer with yarn or a new set of hooks for a thoughtful present.
If you’re a beginner, a simple rectangular design is a good place to start. You can practice basic stitches while creating something useful for your everyday crochet routine.
Crochet Hook Case Pattern: Project Details
Before gathering your supplies, consider the design and size you want to make.
| Project detail | Description |
|---|---|
| Project | Crochet hook case |
| Skill level | Beginner-friendly, depending on the design |
| Construction | Main panel with attached pockets |
| Techniques | Basic crochet stitches, joining, and finishing |
| Customization | Colors, pocket sizes, and closures |
| Finished dimensions | Follow the measurements of your chosen pattern |
Your final dimensions will depend on the pattern and the crochet hooks you want to store. Measure your longest hooks before deciding how large to make the case.
Materials and Supplies for Your Crochet Hook Case
You don’t need an extensive collection of supplies to get started. A few basic tools and a suitable yarn are enough for many simple designs.
| Material | Purpose |
|---|---|
| Yarn | Creates the main body and pockets |
| Crochet hook | Works the stitches specified in your pattern |
| Scissors | Trims yarn ends |
| Yarn needle | Weaves in loose ends and may help with assembly |
| Stitch markers | Mark pocket divisions or important stitches |
| Measuring tape | Checks the dimensions of the case |
| Button, tie, or snap | Keeps the finished case closed |
Choosing the Best Yarn
Choose a yarn that creates a firm fabric without feeling too stiff. Cotton yarn is a useful option because it generally offers good stitch definition and structure. Acrylic yarn can also work well if you prefer a soft feel and a wide choice of colors.
Avoid choosing yarn based on appearance alone. A very stretchy fabric may allow hooks to slip out of their pockets, while a fabric that’s too bulky can make the case difficult to fold or carry.
Selecting Your Crochet Hook
Use the hook size recommended by your chosen pattern. If you’re designing your own case, remember that a larger crochet hook may create looser stitches, while a smaller one may produce denser fabric.
Aim for a fabric that holds its shape and has pockets snug enough to support your hooks.
Crochet Stitches and Techniques You’ll Need
A straightforward crochet hook holder can be made using familiar stitches. Check your pattern before starting so you know which techniques you’ll need.
- Chain stitch (ch): Often used to begin the project.
- Single crochet (sc): Creates a compact fabric suitable for many organizers.
- Slip stitch (sl st): Useful for joining or finishing, depending on the design.
- Turning chain: Helps position the next row when crocheting flat.
Consistent tension is important. If your stitches vary significantly, the main panel and pocket section may end up different sizes. Measure your work as you go, and make a small swatch if your pattern includes gauge instructions.
How to Crochet a Hook Case Step by Step
The following overview explains the main construction stages. For a complete, repeatable free pattern, use verified stitch counts, row instructions, and measurements for your chosen design.
Step 1: Crochet the Main Body
Begin by making the rectangular panel that forms the foundation of your hook case. Follow the pattern’s starting chain, stitch instructions, and row count.
Check the width and length before moving on. The panel should be large enough to hold your hooks while still allowing the case to fold or roll comfortably.
Step 2: Make the Crochet Hook Pockets
The pockets keep each hook in its own space. Their depth and width depend on the size of your hooks and the layout you prefer.
Before attaching the pockets, arrange your hooks on the panel to estimate the spacing you need. Leave enough room to insert and remove each hook without stretching the fabric excessively.
Step 3: Attach the Pockets
Position the pocket section against the main panel, aligning the lower and side edges. Join the pieces using the method specified in your pattern.
If the design includes individual compartments, mark their positions before securing the dividers. This helps keep the pockets evenly spaced and prevents some sections from becoming too narrow.
Step 4: Add a Closure
A closure helps keep your tools secure when you carry the case in a project bag. Depending on your design, you might choose:
- A crocheted tie that wraps around the case.
- A button and loop.
- A snap fastening suitable for the fabric.
Choose a closure that’s easy to open but secure enough to prevent the case from unfolding unexpectedly.
Step 5: Finish Your Crochet Hook Organizer
Weave in loose ends and inspect the seams and pocket dividers. Place your hooks inside to check the fit, then close the case and make sure everything stays in place.
If your pattern includes decorative edging, add it according to the instructions. Keep the finish neat so it doesn’t interfere with the pockets or closure.
Tips for Making a Neat and Durable Hook Case
A few simple checks can make a noticeable difference in the finished result.
- Keep your tension consistent across the main panel and pockets.
- Measure the fabric before assembling the pieces.
- Check that each pocket accommodates the hooks you plan to store.
- Secure yarn ends carefully to help prevent unraveling.
- Reinforce the closure if it will be opened and closed frequently.
- Test the case before carrying it with your crochet supplies.
| Common problem | What you can do |
|---|---|
| The fabric curls | Check your tension and follow the pattern’s finishing advice |
| Pockets feel too loose | Review the pocket dimensions and fabric structure |
| Hooks don’t fit comfortably | Recheck the measurements and pocket spacing |
| The case won’t stay closed | Adjust or reinforce the closure |
| Seams look uneven | Mark the edges and pocket divisions before joining |
Creative Ways to Customize Your Crochet Hook Case
One of the best things about making your own crochet hook organizer is the freedom to personalize it.
Experiment with Colors and Textures
Try a neutral shade for a classic look, or combine bright colors for a cheerful accessory. Stripes, contrasting borders, and textured stitches can also make your case stand out.
Add Space for Small Accessories
If you carry stitch markers, yarn needles, or other small tools, consider including an additional pocket. Make sure these compartments are suitable for the items you intend to store.
Turn It into a Handmade Gift
Choose yarn in the recipient’s favorite colors and pair the finished case with a few useful crochet accessories. A handmade organizer is a practical gift for birthdays, holidays, or any occasion when you want to celebrate someone’s love of crochet.
How to Care for Your Crochet Hook Case
Follow the care instructions for your chosen yarn. Some yarns can be gently washed, while others require more careful handling. If your case includes buttons or snaps, check that the closure can tolerate the cleaning method.
Let the case dry completely before storing your hooks. You can keep it flat in a drawer or roll it gently if the design allows, making it easy to tuck into your project bag.
Frequently Asked Questions About Crochet Hook Cases
Is a crochet hook case free pattern suitable for beginners?
Yes, many simple designs use basic stitches and rectangular panels. Choose a pattern that explains the construction clearly and provides the measurements and instructions you need.
What is the best yarn for a crochet hook case?
Cotton yarn is a popular option because it creates a structured fabric with clear stitches. Acrylic yarn may also work well. The best choice depends on the design, durability you want, and care requirements.
How many crochet hooks can a hook case hold?
Capacity depends on the finished size and the number and width of the pockets. Measure your hooks and plan the pocket layout before beginning.
Can I change the size of my crochet hook organizer?
Yes, if the pattern allows adjustments. Changing the main panel or pocket dimensions can accommodate longer hooks or a larger collection, but it may also affect yarn requirements and closure placement.
How do I keep crochet hooks from falling out?
Use pockets that fit your hooks comfortably and add a secure closure. Test the finished case by closing it and moving it gently before carrying it in your bag.
Is a handmade crochet hook case a good gift?
Absolutely. It’s useful, customizable, and especially thoughtful for someone who enjoys crocheting. You can personalize it with favorite colors and include a few small accessories.
Conclusion: Make Your Own Crochet Hook Case
A handmade crochet hook case is a simple way to bring more organization to your crochet routine. With suitable yarn, carefully planned pockets, and a reliable closure, you can create an accessory that keeps your tools together and reflects your personal style.
Gather your supplies, choose a design that matches your skill level, and take your time with the measurements and finishing details. Once your case is complete, fill it with your favorite hooks and keep it ready for your next project.
Ready for your next handmade project? Visit www.crochetwhisper.com for more crochet inspiration, practical tutorials, and ideas to add to your handmade collection. If you make a crochet hook case, share your favorite colors or customization ideas in the comments!