Easy Granny Square Crochet Headband Pattern for Beginners
The tutorial video is at the bottom of the article.👇
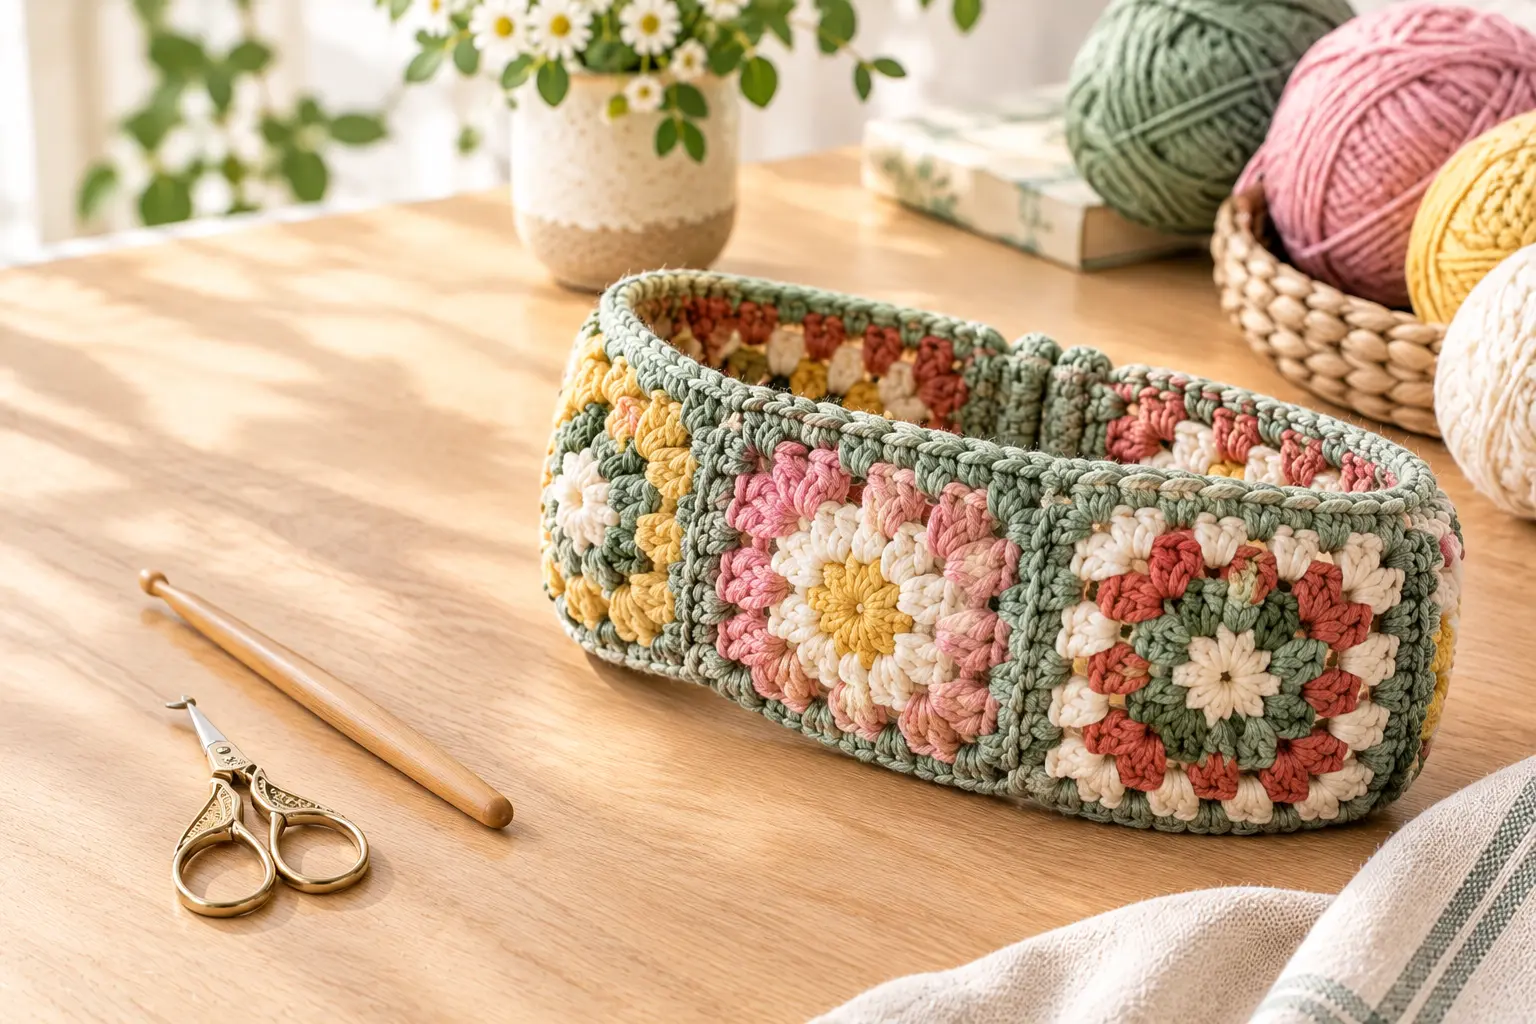
If you love making handmade accessories, this easy granny square crochet headband is a lovely project to add to your list. It combines the timeless charm of classic granny squares with a practical design you can wear throughout the year. Even better, you can use leftover yarn to create something colorful, personal, and completely your own.
Whether you’re new to crochet or already have a basket full of yarn scraps, this crochet headband is a fun way to practice your stitches while making a useful accessory. With a few simple materials and some patience, you’ll have a beautiful handmade headband ready to wear or give as a thoughtful gift.
Why You’ll Love This Granny Square Crochet Headband
Granny squares are popular for a reason. Their repeating stitches make them easy to learn, and you can experiment with different colors without changing the basic pattern.
Here are a few reasons to try this project:
- Beginner-friendly: You can practice basic crochet stitches one square at a time.
- Budget-friendly: Use leftover yarn instead of buying several new skeins.
- Easy to customize: Choose soft neutrals, cheerful pastels, or bold vintage-inspired colors.
- Practical and stylish: Wear your headband with a sweater, cardigan, or casual outfit.
- Perfect for gifting: A handmade accessory makes a thoughtful birthday or holiday present.
You can also adjust the width, square size, and finishing details to create a headband that suits your style.
Materials You’ll Need
Before you begin, gather your supplies. The exact amount of yarn depends on the size of your squares and the finished headband.
| Material | Suggested choice | Purpose |
|---|---|---|
| Yarn | DK or worsted-weight yarn | Creates the granny squares |
| Crochet hook | Size recommended on the yarn label | Helps maintain even stitches |
| Scissors | Small, sharp scissors | Cuts yarn neatly |
| Yarn needle | Blunt tapestry needle | Joins pieces and hides loose ends |
| Measuring tape | Flexible tape measure | Checks the headband’s length |
| Stitch markers | Optional | Marks corners or important stitches |
Choosing the Best Yarn
Cotton yarn is a good choice for a lightweight headband, especially in warmer weather. Acrylic yarn is affordable and comes in a wide range of colors, while wool or wool blends can provide extra warmth during colder months.
For a comfortable fit, choose yarn that feels soft against your skin. If you’re mixing leftover yarn, try to use similar thicknesses so your granny squares remain consistent.
Crochet Stitches You’ll Need
This easy granny square crochet headband uses familiar stitches. If you’re a beginner, practice them on a small swatch before starting.
- Chain stitch (ch): Creates chain spaces and starting loops.
- Slip stitch (sl st): Joins rounds and crochet pieces.
- Double crochet (dc): Forms the clusters that give granny squares their classic appearance.
- Magic ring: An optional method for creating a neat, closed center.
The main technique is the granny cluster, which commonly consists of three double crochet stitches worked into the same space. Chain spaces separate the clusters and help form the corners of the square.
This pattern uses US crochet terminology.
How to Make an Easy Granny Square Crochet Headband
Follow these steps to create your own colorful crochet headband. The instructions describe a simple granny square construction; use the measurements of your finished squares to determine how many you’ll need.
Step 1: Create the Center of Your Granny Square
Start with a magic ring or chain a small loop and join it with a slip stitch. Work your first round of double crochet clusters and chain spaces into the center.
Keep your stitches relaxed enough for the square to lie flat. Join the round neatly before moving on.
Step 2: Crochet the Granny Square Rounds
Continue working clusters of double crochet into the spaces between the previous round’s clusters. At each corner, work the stitches and chain spaces needed to create a clear right angle.
You can use one color throughout or change yarn colors between rounds. For a vintage look, try a cream center with dusty pink, sage green, or warm brown outer rounds.
Keep crocheting until the square reaches your desired size. Check that it lies flat and has four clear corners.
Step 3: Make the Remaining Squares
Repeat the same process to create additional squares. The number you’ll need depends on their size, your head measurement, and how wide you want the headband to be.
As you work, compare the squares to make sure they are approximately equal in size. Consistent squares make joining much easier and give the finished accessory a neat appearance.
Step 4: Join the Granny Squares
Lay your squares in a row and arrange the colors until you’re happy with the design.
Join the squares using slip stitches, single crochet, or a tapestry needle and yarn. Whichever method you choose, try to keep the tension even. Pulling the joining yarn too tightly can cause the headband to pucker.
Before securing the final join, wrap the strip gently around your head to check the length.
Step 5: Finish the Crochet Headband
Join the two ends to form a loop, making sure the squares are aligned correctly. If you prefer an adjustable design, you can add ties or a suitable button closure instead.
Weave in loose yarn ends with your tapestry needle. You can also add a simple border around the edges for a more finished look.
Finally, gently shape the headband and check that the seams feel comfortable against your skin.
How to Get the Right Headband Size
A comfortable fit makes all the difference. Measure around your head where you plan to wear the headband, then compare that measurement with the length of your joined squares.
Consider these adjustments:
- For a narrow headband: Use smaller squares or keep the design simple.
- For a wider headband: Make larger squares or add a border.
- For a snug fit: Account for the stretch of your yarn and stitches.
- For an adjustable fit: Add ties or a button closure.
Don’t assume that a particular number of squares will fit everyone. Measure your work before joining the ends permanently, as square dimensions and yarn tension can change the finished length.
Creative Ways to Customize Your Crochet Headband
One of the best things about granny squares is how easily you can change their appearance.
Classic Vintage Style
Combine mustard, rust, cream, and brown for a retro-inspired accessory. A contrasting border can make the colors stand out.
Soft and Neutral
Use ivory, beige, taupe, or gray for a subtle headband that pairs easily with everyday outfits.
Colorful Boho Design
Mix several bright shades or pastels. Keep the square sizes consistent while experimenting with different color combinations.
Handmade Gifts
Make matching headbands for friends and family, or pair your finished accessory with a crochet scarf or fingerless gloves for a coordinated gift.
Common Crochet Headband Problems and How to Fix Them
Why are my granny squares curling? Check your stitch counts and corner spaces. Tight tension can also cause curling, so try a larger hook if appropriate for your yarn.
Why are my squares different sizes? Count your rounds and maintain consistent tension. Using the same yarn thickness and hook throughout the project can help.
What if my headband is too tight? Recheck the length before joining the ends. You may need larger squares, additional length, or an adjustable closure.
How can I make the seams look neater? Use a consistent joining method and weave loose ends securely through several stitches.
How to Care for Your Handmade Headband
Always check the yarn label before washing your crochet headband. Some yarns can be machine-washed, while delicate fibers may need gentle hand-washing.
Avoid twisting or wringing the accessory. If the yarn’s care instructions allow it, reshape the headband and leave it flat to dry. Store it in a clean, dry place to help preserve its shape.
Frequently Asked Questions
Is a granny square crochet headband easy for beginners?
Yes! This crochet headband is a manageable project if you know how to chain, slip stitch, and double crochet. You can practice each square separately before assembling the finished accessory.
How many granny squares do I need for a crochet headband?
The number depends on the size of each square, the desired headband length, and the wearer’s head measurement. Arrange the squares in a row and measure the strip before joining the ends.
What is the best yarn for a crochet headband?
Cotton is breathable, acrylic is budget-friendly, and wool blends can provide warmth. Choose a soft yarn that suits the season and feels comfortable against your forehead.
How long does it take to crochet a granny square headband?
That depends on your experience, the size of the squares, and how many you need. Since you work one square at a time, you can make progress in short crochet sessions.
Can I use leftover yarn for this pattern?
Absolutely! Granny squares are ideal for using yarn scraps. For a more consistent result, choose yarns with similar thicknesses and care requirements.
How do I make my crochet headband fit better?
Measure your head, check the length of the joined squares, and account for the stretch of the fabric. Adjust the number or size of the squares before completing the final seam.
Conclusion
This easy granny square crochet headband pattern is a wonderful way to turn simple stitches and leftover yarn into a practical handmade accessory. With a few basic supplies, you can create a vintage-inspired design, a soft neutral headband, or a colorful piece that reflects your personality.
Take your time with the squares, keep your stitches consistent, and check the fit before joining everything together. Small details like neat seams and carefully woven ends will help your finished headband look polished.
Ready to start crocheting? Gather your favorite yarn colors, make your first granny square, and enjoy creating a headband that’s uniquely yours. Save this pattern for your next crochet session, and share your finished creation with fellow crochet lovers!