How to Crochet a Phone Holder | FREE Pattern
The tutorial video is at the bottom of the article.👇
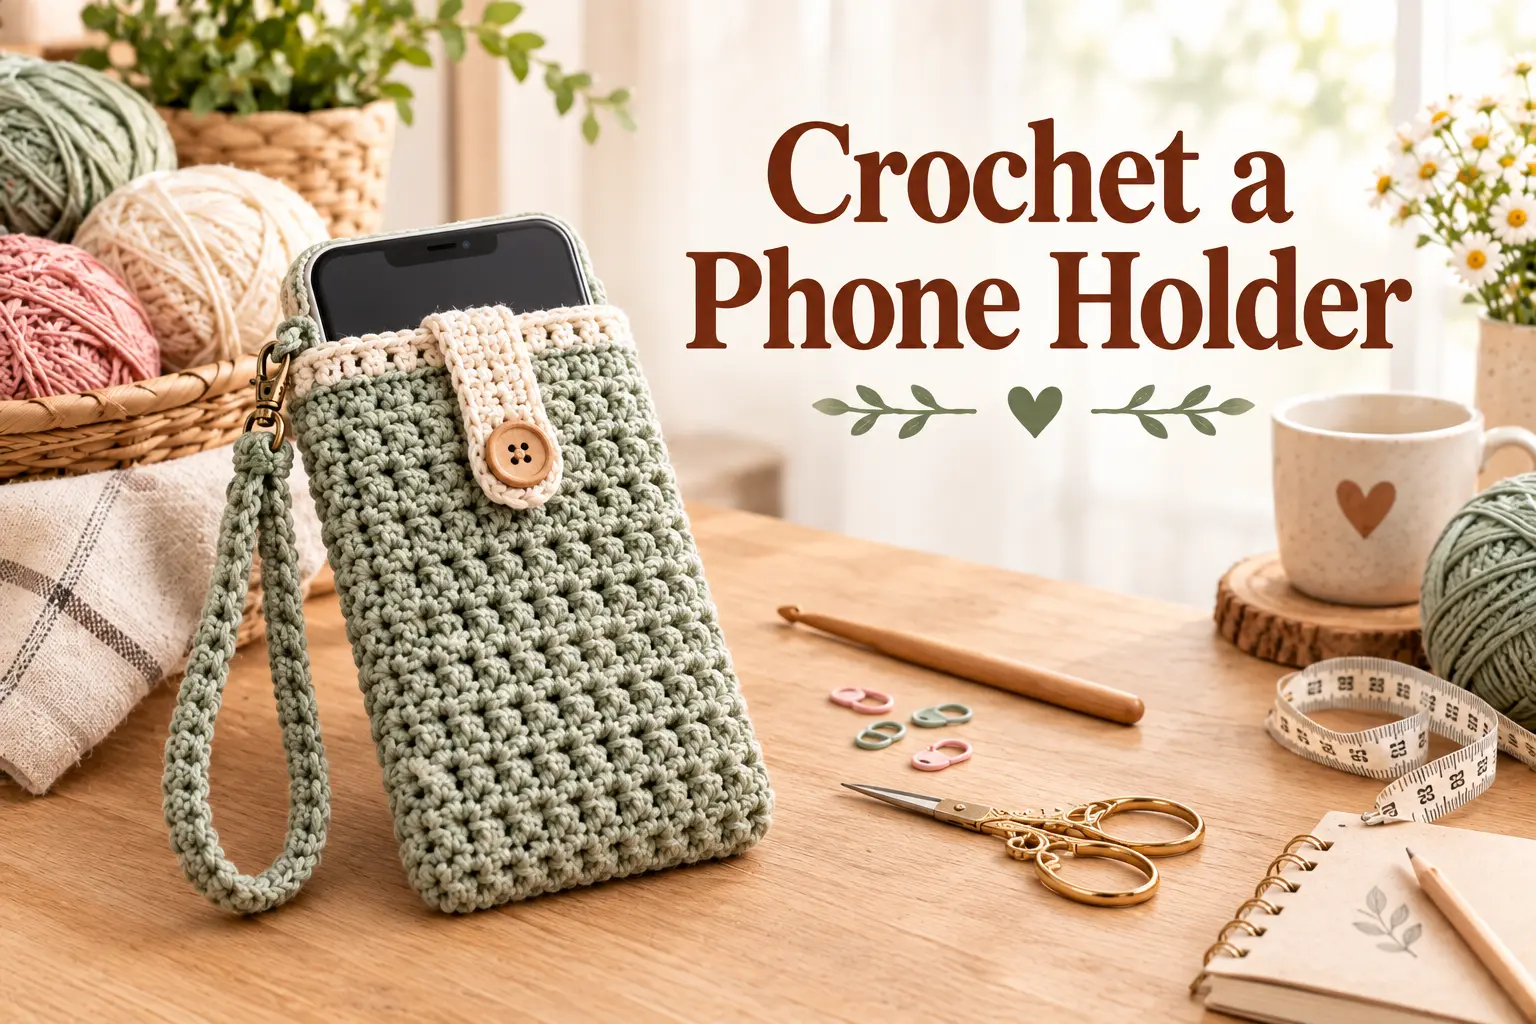
A crochet phone holder is one of the fastest, most practical small projects you can make, and it’s a genuinely useful way to use up small amounts of leftover yarn. This pattern creates a simple pouch with a secure top closure, perfect for protecting your phone screen from scratches in a bag or for hanging on a bedside hook.
This guide walks you through the entire process, from the base to the finished strap, using techniques that are quick to learn even for total beginners.
Why a Crochet Phone Holder Makes a Great Quick Project
Small accessory projects like this one are ideal for practicing new techniques without a big time investment, and they make excellent gifts since they finish in under an hour for most crocheters. The simple pouch shape also means you can easily customize the size for tablets, sunglasses, or other small items.
What makes this project worth making:
- Finishes in under an hour, even for beginners
- Great way to use up small amounts of leftover yarn
- Simple pouch shape adapts easily to other small item sizes
- A quick, satisfying gift project for friends and family
What You’ll Need: Materials Table
Gather your supplies before starting, since this project moves quickly once you get into a rhythm.
| Item | Recommended Type | Approximate Amount |
|---|---|---|
| Yarn | Worsted weight, cotton or acrylic blend | 30-50g |
| Crochet hook | 4mm-4.5mm (US G/6-7) | 1 |
| Yarn needle | Blunt tip | 1 |
| Button | Small, decorative | 1 |
| Measuring tape | Flexible | 1 |
A cotton blend yarn offers a bit of structure and durability, while a soft acrylic works well too if you’d prefer a fuzzier, more cushioned feel.
Sizing Guide
Measure your phone directly before starting, since phone dimensions vary significantly between models.
| Phone Size | Pouch Width (approx.) | Pouch Height (approx.) |
|---|---|---|
| Compact Phone | 3 inches | 5.5 inches |
| Standard Phone | 3.5 inches | 6 inches |
| Large/Plus Phone | 4 inches | 6.5 inches |
Measure your phone’s width and length, then add a small amount of ease on each side so it slides in and out comfortably.
Step-by-Step: How to Crochet the Phone Holder
Step 1: Chain Your Foundation
- Chain to match your phone’s width plus a small amount of ease, based on the sizing chart above.
- Add a small turning chain to begin your first row.
- Double-check your total chain count before starting your first row.
Step 2: Work the Main Pouch Body
- Work rows in a simple, repeated stitch, such as single crochet or half double crochet
- Turn at the end of each row and continue evenly
- Continue until you reach your desired pouch height, checking against the sizing chart
- Keep your tension slightly firm, since a snugger fabric protects your phone screen better than a loose one
Step 3: Fold and Seam the Sides
- Fold your finished rectangle in half, right sides together, to form the pouch shape.
- Using a yarn needle, whip stitch or slip stitch the two side seams closed.
- Leave the top edge open for inserting your phone.
- Turn the pouch right side out.
Step 4: Add the Top Flap and Closure
- Continue working rows from the back edge of the pouch to create a small flap that folds over the top opening
- Work a buttonhole into the flap by chaining a small gap partway through one row
- Sew a button onto the front of the pouch to align with the buttonhole
- Weave in all loose ends securely
Tips for a Clean, Functional Finish
- Keep your tension slightly firm throughout, since this helps protect your phone screen from scratches
- Double-check your phone’s measurements before starting, since even small sizing errors are noticeable in such a compact project
- Choose a color or stripe pattern that makes the pouch easy to spot inside a larger bag
- Block gently if using cotton yarn, to help the stitches lie flat and even
Common Mistakes to Avoid
- Skipping the phone measurement step — leads to a pouch that’s too tight or too loose for a comfortable fit
- Working too loosely — reduces the protective cushioning the pouch provides
- Uneven side seams — creates a lopsided pouch shape that doesn’t sit evenly
- Placing the buttonhole too close to the edge — can weaken the flap or cause the button to slip out easily
Frequently Asked Questions
What yarn is best for a crochet phone holder? A cotton blend or worsted weight acrylic works well, offering enough structure to protect your phone while still being soft and easy to work with.
What hook size should I use for this phone holder pattern? A 4mm to 4.5mm hook pairs well with worsted weight yarn to create a snug, protective fabric.
How much yarn do I need to crochet a phone holder? Expect to use just 30 to 50 grams, making this an excellent project for using up leftover yarn from other projects.
How long does it take to crochet a phone holder? Most crocheters finish this project in under an hour, making it a great last-minute gift idea.
Can I adjust this pattern for a tablet or sunglasses instead? Yes — simply measure your item and adjust the chain and row counts accordingly, following the same basic pouch construction.
Conclusion
This crochet phone holder proves that a small, quick project can still be genuinely useful and satisfying to make. With the materials list, sizing chart, and step-by-step instructions above, you have everything you need to create a protective pouch in under an hour, using yarn you likely already have on hand.
Grab your leftover yarn, chain your foundation today, and work your way through this fast, rewarding project. Once your phone holder is finished, share it with your crochet community — a small handmade accessory like this one makes a wonderful gift.