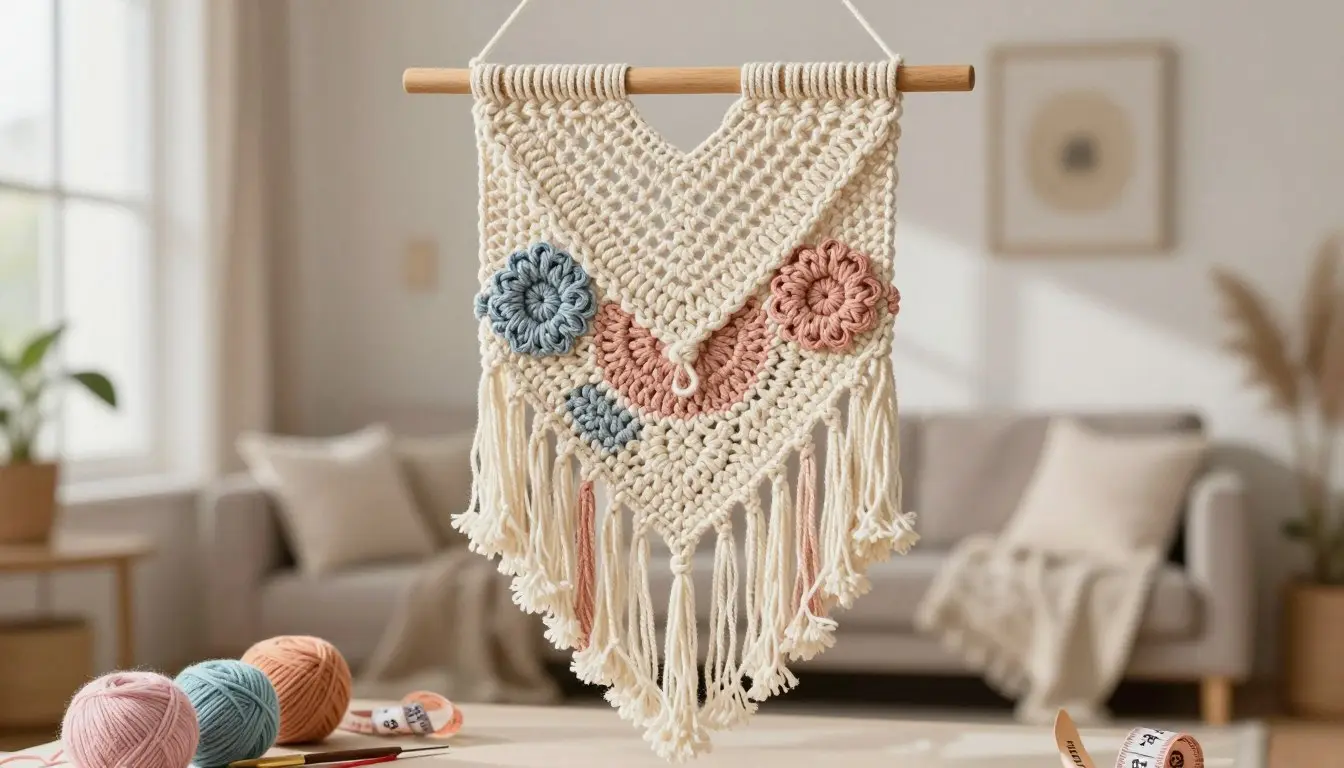
FREE Crochet Wall Hanging Pattern
Adding a touch of handmade charm to your living space is easier than you might think. This free crochet wall hanging pattern provides a simple way to introduce soft texture and modern style into any room of your home.
Whether you are a beginner or an experienced crafter, this project offers a relaxing way to create unique crochet wall decor. You will find clear instructions covering essential materials, foundational techniques, and assembly steps to ensure your success.

This DIY wall hanging is highly flexible, allowing you to personalize the final look. You can easily adjust the size, choose your favorite yarn colors, or add fringe and beads for extra flair. Follow our guide to master the process and display your beautiful creation with pride.
Key Takeaways
- Learn to create beautiful, textured fiber art for your home.
- Access a complete guide covering materials and assembly.
- Discover how to customize your project with colors and fringe.
- Master foundational techniques suitable for all skill levels.
- Get expert tips on displaying and caring for your finished piece.
Materials, Finished Size, and Pattern Details for the Crochet Wall Hanging
To achieve the perfect crochet texture in your crochet home decor, you must first understand the materials and dimensions involved. Selecting the right supplies ensures that your project maintains its shape while hanging beautifully on your wall.
Yarn, Crochet Hook, and Notions
Choosing a Medium-Weight Yarn for Texture and Shape
For this project, a medium-weight (worsted) yarn is ideal because it provides the necessary structure for a crochet wall hanging. This weight balances softness with durability, allowing your stitches to stand out clearly.
Natural fibers like cotton or wool blends are excellent choices. They hold their shape well, which is vital for maintaining the integrity of your crochet wall art over time.
Recommended Hook, Scissors, Tapestry Needle, and Wooden Dowel
Having the right tools makes the crafting process much smoother. You will need a standard crochet hook that matches your yarn label recommendations, typically a size H/8 (5.0mm).
- Crochet Hook: Size H/8 (5.0mm) for consistent tension.
- Scissors: Sharp blades for clean yarn cuts.
- Tapestry Needle: Essential for weaving in ends securely.
- Wooden Dowel: A 12-inch rod to support the finished piece.
Finished Dimensions and Skill Level
Expected Width and Length Before Adding Fringe
The base of your crochet tapestry will measure approximately 10 inches in width and 12 inches in length. Please note that these measurements are taken before you attach any decorative fringe.
Adding fringe will increase the total length by several inches, depending on your personal preference. This crochet hanging pattern is designed for beginners, making it a great way to practice basic skills.
Stitches, Abbreviations, and Basic Techniques Used
You will encounter a few fundamental stitches that are easy to master. Familiarizing yourself with these abbreviations will help you follow the instructions with confidence.
| Abbreviation | Stitch Name | Technique |
|---|---|---|
| ch | Chain | Foundation |
| sc | Single Crochet | Main Fabric |
| dc | Double Crochet | Texture |
By mastering these simple techniques, you will create a professional-looking piece that adds warmth to any room. Focus on keeping your tension even to ensure the final fabric hangs straight and looks polished.
Prepare the Yarn, Hook, and Workspace
Preparing your yarn and hook correctly ensures your beginner crochet project starts on the right foot. A clean, well-lit area allows you to focus entirely on your DIY wall hanging without unnecessary distractions. Taking these small steps early on helps you maintain a steady rhythm as you work.

Check the Gauge Before Starting the Pattern
Checking your gauge is a vital step that many crafters overlook. By creating a small test swatch, you confirm that your stitches match the designer’s intended size. This simple practice prevents your finished piece from being too small or unexpectedly large.
How Gauge Affects the Wall Hanging’s Drape
Gauge directly influences the density and drape of your fabric. If your stitches are too tight, the wall hanging may feel stiff and lose its natural flow. Conversely, loose stitches can make the fabric stretch out of shape over time.
Make a Slip Knot and Foundation Chain
Every project begins with a secure slip knot. This knot acts as the anchor for your entire piece, so it should be snug but not overly tight. Once your slip knot is set, you will begin working your foundation chain according to the crochet pattern instructions.
Keeping the Chain Loose and Even
Maintaining a consistent tension in your foundation chain is crucial for a professional look. If your chain is too tight, the bottom edge of your wall hanging will pull inward. Try using a slightly larger hook for the foundation row if you tend to crochet tightly.
Organize the Project for Consistent Tension
Consistent tension is the secret to beautiful crochet stitches that look uniform throughout the design. Keep your yarn ball in a bowl or a dedicated yarn bag to prevent tangles. This simple organization keeps your yarn flowing smoothly, which helps you maintain an even pull on the thread.
Tips for Managing Yarn Ends and Row Turning
Managing your yarn ends as you go saves significant time during the finishing process. When turning your work at the end of a row, ensure you maintain the same direction to keep the edges straight. Refer to the table below to ensure you have all your preparation steps covered.
| Preparation Step | Why It Matters | Pro Tip |
|---|---|---|
| Gauge Swatch | Ensures correct size | Measure 4×4 inch area |
| Foundation Chain | Sets the base width | Use a larger hook |
| Yarn Management | Prevents tangles | Use a yarn bowl |
| Row Turning | Keeps edges straight | Count your stitches |
Crochet Wall Hanging Foundation and Main Fabric
Establishing a solid base ensures that your free crochet wall hanging pattern maintains its shape over time. By focusing on the initial construction, you create a professional foundation that supports the weight of the decorative elements added later.
Work the Foundation Row
Placing the First Single Crochet Stitches
Begin by working your foundation chain to the desired width. When placing your first row of crochet stitches, insert your hook into the second chain from the hook. Work one single crochet into each chain across the entire length to establish a sturdy starting point.
Counting Stitches to Maintain the Correct Width
Consistency is vital for a balanced crochet tapestry. Count your stitches at the end of every row to ensure you have not accidentally increased or decreased your count. Keeping an accurate tally prevents the edges from slanting or warping as the fabric grows.

Build the Main Rows With the Featured Stitch Pattern
Working Single Crochet Rows for a Firm Base
A firm base is essential for any yarn wall hanging. By alternating rows of single crochet, you create a dense fabric that resists stretching. This tight construction provides the perfect canvas for your design.
Adding Half Double Crochet Texture for Visual Dimension
To add visual interest, incorporate rows of half double crochet into your crochet pattern instructions. These slightly taller stitches create a subtle, rhythmic texture that breaks up the monotony of the base. The combination of these two stitches results in a professional, high-quality finish.
Repeat the Pattern Until the Body Reaches the Desired Length
Checking Edges for Straightness as You Crochet
Periodically lay your work flat on a table to inspect the edges. If you notice the sides pulling inward, you may need to adjust your tension or check your stitch count. Maintaining straight edges is a hallmark of a well-crafted crochet hanging pattern.
Adjusting Row Count for a Larger or Smaller Wall Hanging
You can easily customize the size of your project by modifying the number of rows you work. Follow these simple guidelines to ensure your piece remains proportional:
- For a smaller piece: Reduce the number of pattern repeats by two or four rows.
- For a larger piece: Continue the pattern sequence until you reach your preferred length.
- Maintain symmetry: Always end on the same type of row you started with to keep the design balanced.
Add Texture, Color, and Decorative Details
Modern crochet decor often relies on the perfect balance of texture and color to stand out. By incorporating intentional design choices, you can elevate a basic pattern into a sophisticated wall hanging that reflects your personal style.
Create Raised Texture With Strategic Stitch Changes
Adding crochet texture is an effective way to create visual interest without needing complex patterns. Strategic stitch placement allows you to build depth while maintaining the structural integrity of your fabric.
Using Front Post Stitches Without Distorting the Fabric
Front post stitches are excellent for creating ridges that pop from the surface. To prevent the fabric from buckling, ensure you maintain a consistent tension throughout these stitches. Always check your gauge after completing a few rows to ensure the piece remains flat and even.
Combining Smooth and Textured Rows
Alternating between smooth, flat stitches and raised textured rows creates a balanced look. This technique prevents the fabric from becoming too heavy or stiff. By spacing out your textured rows, you allow the design to breathe while highlighting the unique stitch definition.
Introduce Color Changes for a Modern Accent
Mastering crochet color changes is essential for achieving a clean, professional finish. Whether you prefer subtle shifts or bold statements, the way you transition between yarns defines the quality of your work.
Carrying or Changing Yarn Cleanly at the Row End
For the cleanest results, change your yarn color on the final pull-through of the last stitch in a row. This method hides the transition point and keeps your edges neat. If you are working with multiple colors, consider carrying the yarn up the side of the work to minimize the number of ends you need to weave in later.
Selecting Neutral, Earth-Tone, or High-Contrast Color Combinations
Your choice of palette significantly impacts the final aesthetic of your wall hanging. Consider the following table to help you decide which color scheme best fits your space:
| Palette Type | Visual Effect | Best For |
|---|---|---|
| Neutral | Calm and minimalist | Scandi-style homes |
| Earth-Tone | Warm and organic | Boho-inspired decor |
| High-Contrast | Bold and graphic | Modern focal points |
“The beauty of handmade decor lies in the small, intentional details that turn a simple thread into a story.”
Attach Fringe, Tassels, or Other Crochet Embellishments
Adding crochet fringe or tassels provides a playful, finished look to your wall hanging. These elements add movement and soften the bottom edge of your project.
Cutting Even Fringe Strands
To ensure your fringe looks uniform, use a piece of cardboard as a template for cutting your yarn strands. Wrap the yarn around the cardboard multiple times, then cut along one edge to create consistent lengths. This simple trick saves time and ensures every strand is identical.
Securing Tassels So They Hang Neatly
When attaching tassels, use a crochet hook to pull the folded loop through the fabric edge. Pass the ends of the tassel through the loop and pull tight to secure it firmly. Trim the ends once attached to ensure the bottom line is perfectly straight and professional.
Shape, Block, and Assemble the Wall Hanging
Proper finishing techniques are the secret to turning a simple project into high-quality handmade home decor. Once your stitches are complete, the final steps of refining the edges and mounting the piece bring your vision to life.
Weave in Ends and Prepare the Edges
Before moving to the final assembly, you must secure all loose ends to ensure your yarn wall hanging remains durable. A clean finish on the back is the hallmark of a professional crafter.
Hiding Yarn Tails on the Back of the Project
Use a tapestry needle to weave your yarn tails through the back loops of the stitches. Always weave in multiple directions to prevent the ends from slipping out over time. Consistency is key to keeping the front of your work looking pristine.
Correcting Loose Stitches or Uneven Side Edges
If you notice loose stitches, gently pull the surrounding yarn to distribute the tension evenly. For uneven edges, a simple single crochet border can provide a uniform look. This small adjustment significantly improves the overall symmetry of your piece.
Block the Crochet Fabric for a Polished Shape
Crochet blocking is an essential process that relaxes the fibers and sets the final dimensions of your work. This step transforms a slightly curled or uneven piece into a flat, professional display item.
Wet Blocking and Air-Drying Safety
Submerge your project in cool water with a gentle wool wash, then squeeze out excess moisture using a towel. Lay the piece flat on a blocking mat or a clean towel, away from direct heat sources.
“Blocking is the magic wand that turns a handmade item into a professional masterpiece,” says a veteran fiber artist.
Maintaining the Intended Width and Length
Use rust-proof pins to secure the edges of your fabric to your desired measurements. Ensure the corners are square and the sides are straight while the piece dries completely. This patience ensures your handmade home decor maintains its intended shape for years.
Attach the Crochet Piece to a Wooden Dowel
Mounting your work onto a wooden dowel wall hanging provides the necessary structure for a beautiful display. This method allows the fabric to drape naturally against the wall.
Creating a Secure Top Sleeve
Fold the top edge of your crochet fabric over the dowel and sew it securely to the back of the piece. Use a whip stitch for a strong hold that remains hidden from the front view. This creates a clean, professional channel for the dowel to slide through.
Adding Cord, Ribbon, or Leather-Style Hanging Loops
To complete your yarn wall hanging, attach a decorative element to the ends of the dowel. Consider these options for a personalized touch:
- Braided jute cord for a rustic, natural aesthetic.
- Satin ribbon to add a touch of elegance and color.
- Leather strips for a modern, sophisticated finish.
Once your chosen material is attached, your wooden dowel wall hanging is ready to be showcased. Proper crochet blocking and careful assembly ensure your hard work stands the test of time.
Display, Care, and Creative Customization Ideas
Now that your piece is finished, let’s explore how to display, maintain, and customize your crochet home decor. Proper placement and routine maintenance ensure your handmade work remains a stunning focal point in your living space.
Choose the Best Location for the Finished Wall Hanging
Balancing Scale, Lighting, and Surrounding Decor
When selecting a spot for your crochet wall art, consider the scale of the wall relative to the size of your piece. A large, intricate design works best as a standalone statement, while smaller pieces can be grouped to create a gallery effect.
Natural lighting enhances the texture of the yarn, making it a great choice for bright areas. Avoid direct, harsh sunlight for extended periods to prevent potential fading of vibrant fibers.
Using the Piece in Bedrooms, Entryways, Nurseries, or Living Rooms
In bedrooms, place your crochet wall decor above the headboard to add a soft, cozy aesthetic. Entryways benefit from a welcoming piece that sets the tone for your home, while nurseries are perfect for whimsical, textured designs.
Living rooms offer the most versatility for displaying your crochet decoration. Try centering it above a sofa or a console table to anchor the room’s design.
Care for the Crochet Wall Hanging
Dusting, Spot Cleaning, and Preventing Stretching
To keep your piece looking fresh, gently dust it with a soft-bristled brush or a handheld vacuum on a low setting. If you notice a stain, use a damp cloth with mild soap to spot clean the affected area.
“The beauty of handmade art lies in its longevity, provided it receives the gentle care it deserves.”
To prevent stretching, ensure the wooden dowel is securely mounted and the weight of the yarn is evenly distributed. Avoid hanging the piece in high-humidity areas, which can cause the fibers to sag over time.
Storing the Piece Without Flattening the Texture
If you need to store your crochet decoration, roll it loosely around a cardboard tube rather than folding it. This technique protects the delicate crochet fringe and prevents the main stitch pattern from becoming permanently creased or flattened.
Customize the Pattern for Different Home Styles
Changing the Size, Fringe Length, and Color Palette
You can easily adapt this pattern to fit any room by adjusting the number of foundation chains. Experimenting with the length of your crochet fringe can also change the overall vibe, from minimalist to bohemian.
Updating your crochet home decor is as simple as swapping your color palette. Choose neutral tones for a modern look or bold, contrasting colors to make a vibrant statement.
Adding Beads, Wooden Shapes, or Layered Crochet Motifs
Personalize your work by incorporating unique elements like wooden beads or geometric shapes. You can also sew on layered crochet motifs to add depth and visual interest to the finished piece.
Conclusion
Creating a Crochet Wall Hanging transforms simple yarn into a striking focal point for any room. This free crochet wall hanging pattern provides the structure needed to build a professional piece from start to finish.
You now possess the skills to manage gauge, execute complex stitches, and block your work for a crisp appearance. Every step contributes to the quality of your handmade home decor.
Feel free to experiment with different fiber weights or vibrant color palettes to match your personal aesthetic. Adjusting the length of your fringe or adding unique wooden beads allows you to tailor the design to your specific vision.
This project serves as a perfect introduction to modern crochet decor. Your finished piece brings warmth and texture to your walls while showcasing your creative talent. Share your results with the crafting community to inspire others to start their own fiber art journey.
FAQ
What type of yarn is most effective for this FREE Crochet Wall Hanging Pattern?
To achieve the best handmade texture and structural integrity, a medium-weight yarn (Level 4) is ideal. Brands like Red Heart Super Saver or Lion Brand 24/7 Cotton are excellent choices because they offer the firmness required for single crochet rows while allowing half double crochet textures to pop. Using a natural fiber or a sturdy acrylic blend ensures the project maintains its shape when suspended from a wooden dowel.
Why is it important to check the gauge before starting the foundation chain?
Checking the gauge is essential for controlling the wall hanging’s drape and fabric density. Because this project relies on specific finished dimensions, a gauge that is too loose may cause the piece to sag over time, while a gauge that is too tight can make the crochet tapestry effect appear stiff. Adjusting your crochet hook size after a small sample ensures the expected width and length are accurate before you add the decorative fringe.
How can I ensure the side edges of my wall decor stay straight?
Straight edges are achieved through consistent row turning and meticulous stitch counting. By placing the first single crochet correctly and maintaining even tension, you avoid the common issue of the fabric tapering or expanding. If you notice slight irregularities, wet blocking the finished piece will help refine the polished shape and correct any minor tension shifts before final assembly.
What are the best methods for adding decorative details and color?
You can introduce visual dimension by using strategic stitch changes, such as front post stitches, which create a raised texture. For a modern crochet decor aesthetic, try clean color changes at the end of rows using neutral or earth-tone palettes. Adding tassels, beads, or wooden shapes to the fringe strands can further customize the piece to fit American home decorating styles like Boho or Scandi-Minimalism.
How do I securely attach the finished crochet piece to the wooden dowel?
The most stable method is to create a secure top sleeve by folding the top edge over the wooden dowel and sewing it in place with a tapestry needle. Alternatively, you can use hanging loops made of cord, ribbon, or leather for a more rustic look. This ensures the weight of the yarn wall hanging is distributed evenly, preventing the fabric from distorting while on display in an entryway or nursery.
What is the recommended way to care for and clean handmade crochet wall art?
To preserve the raised texture and prevent stretching, avoid machine washing. Regular dusting and occasional spot cleaning with a damp cloth are sufficient for maintenance. When moving or redecorating, store the piece flat to ensure the crochet fringe remains straight and the stitch pattern does not become flattened or misshapen.
Can I adjust the size of this pattern for different rooms?
Yes, the pattern is highly flexible. You can increase the row count to create a longer piece for a living room focal point or shorten the foundation chain for a smaller accent in a bedroom. Remember that changing the size will affect the amount of medium-weight yarn required and may necessitate a longer or shorter wooden dowel for proper support.