FREE Crochet Earrings Pattern
Creating your own handmade crochet jewelry is a rewarding way to express your personal style. Whether you are a beginner or a seasoned crafter, this free crochet earrings pattern offers a simple path to making beautiful accessories.
This guide provides clear, step-by-step instructions to help you master the craft. You will learn everything from selecting the right materials to finishing your final piece with professional care.
We will explore motif construction, assembly techniques, and creative ways to customize your designs. Get ready to transform basic yarn into stunning, wearable art that reflects your unique personality.
Key Takeaways
- Learn to create stylish accessories with a simple, beginner-friendly guide.
- Discover essential materials needed for your next DIY project.
- Master basic motif construction and assembly techniques.
- Explore various ways to customize your finished pieces.
- Follow expert tips for long-lasting care and maintenance.
Materials and Tools for Crochet Earrings
Before you begin your first stitch, it is essential to prepare the proper crochet earring materials. Having the right supplies on hand ensures that your finished pieces look professional and hold their shape beautifully.
Yarn, Crochet Hook, and Earring Findings
Choosing Lightweight Cotton Thread or Fine Yarn
For delicate jewelry, cotton crochet thread is the gold standard. This material provides excellent stitch definition and keeps the earrings lightweight, which is vital for comfortable all-day wear.
Avoid bulky acrylic yarns, as they can make the motifs look heavy or distorted. Instead, opt for a high-quality cotton crochet thread in a size 10 or 20 for the best results.
Selecting Hypoallergenic Hooks, Jump Rings, and Ear Wires
Since these items will be in direct contact with your skin, choosing hypoallergenic earring findings is a smart decision. Look for materials like sterling silver, surgical steel, or gold-filled components to prevent irritation.
You will also need a crochet hook that matches the weight of your thread. A small steel hook, typically ranging from 1.25mm to 1.75mm, works perfectly to create tight, clean stitches that maintain the structure of your design.
Additional Supplies for Finishing
Scissors, Tapestry Needle, Stitch Markers, and Jewelry Pliers
Precision is key when working on a small scale. Keep a pair of sharp embroidery scissors nearby to trim your ends closely and neatly.
A tapestry needle is necessary for weaving in loose ends, while stitch markers help you keep track of your rounds. Finally, a set of jewelry pliers is essential for opening and closing your hypoallergenic earring findings securely.
Optional Fabric Stiffener and Blocking Materials
To give your earrings a crisp, professional finish, you may want to use a fabric stiffener. This product helps the crochet motifs maintain their shape even after repeated wear.
Blocking mats or a simple piece of foam board with rust-proof pins will also help you shape the motifs perfectly. Taking the time to block your work ensures that every pair of earrings looks polished and ready to wear.
Pattern Notes, Abbreviations, and Preparation
Success in crochet starts with a clear understanding of the terminology and techniques required for your design. Taking a moment to review these details ensures that your project remains organized and stress-free from start to finish.
Recommended Skill Level and Finished Earring Size
This pattern is designed for beginners who are comfortable with basic stitches. You will find that the instructions are straightforward and easy to follow.
The final crochet earring size typically measures about two inches in diameter, depending on your yarn choice. Keep in mind that using a thinner thread will result in a smaller, more delicate piece.
American Crochet Abbreviations Used in the Pattern
To follow the instructions accurately, you must be familiar with standard crochet abbreviations. These shorthand terms allow for concise and readable patterns.
Chain, Slip Stitch, Single Crochet, and Double Crochet
The pattern relies on four primary stitches. You will use the chain (ch) to create the foundation, while the slip stitch (sl st) helps move across the work. The single crochet (sc) and double crochet (dc) provide the height and texture needed for the motif.
Increasing, Joining, and Fastening Off
You will perform an increase (inc) by working two stitches into the same space to expand the shape. When you reach the end of a round, you will join with a slip stitch to keep the circle closed. Finally, fastening off secures your yarn so the piece does not unravel.
Preparing the Yarn and Checking the Motif Shape
Before you begin, ensure your yarn is free of tangles. A smooth working surface helps you maintain focus while you build your motif.
How Tension Affects the Earring’s Size and Draping
Your crochet tension plays a vital role in the final look of your jewelry. If your stitches are too tight, the earring may appear stiff and lose its natural drape. Conversely, loose stitches can make the motif look uneven or floppy.
Keeping Both Earrings Consistent
To ensure both earrings match perfectly, try to complete them in one sitting. If you must take a break, measure your work against the first piece frequently. This simple habit guarantees that your finished pair looks professional and uniform.
How to Crochet the Earring Motifs
Every stunning pair of handmade earrings relies on a perfectly executedcrochet foundation ring. This initial step provides the structural integrity needed for your jewelry to hold its shape over time.
Creating the Foundation Ring
Making the Starting Chain and Joining It Securely
Begin by creating a slip knot on your hook. Chain the number of stitches specified in your pattern, then insert your hook into the first chain stitch to form a loop. Use a slip stitch to join the ends, ensuring the connection is tight and secure.
Working the First Round Without Twisting the Ring
Carefully lay your work flat on a table before you begin the first round. This simple check prevents the ring from twisting, which is a common mistake for beginners. Keeping the loop flat ensures yourcrochet earring motifremains perfectly circular.

Building the Main Motif
Spacing Stitches Evenly Around the Center
Once your foundation is ready, you must distribute your stitches evenly. Work your designated number of double or single crochets into the center of the ring. Consistent tension is vital here to ensure the center remains balanced.
Forming the Decorative Points or Openwork Shape
To create the signature look of your earrings, you will often work chains or picots into the main round. These elements add the delicate, lacy texture that defines a professionalcrochet earring motif. Follow your pattern closely to maintain the correct spacing between these decorative points.
Shaping the Final Round
Adding the Edge for Definition and Stability
The final round provides the necessary structure to keep your earrings from curling. Adding a round of slip stitches or a tight border creates a crisp edge. This step is essential for following the bestcrochet earrings instructionsto ensure a polished finish.
Joining the Round and Hiding the Yarn Tails
Finish the round by joining with a slip stitch to the first stitch of the row. Cut your yarn, leaving a tail of at least four inches. Use a tapestry needle to weave this tail securely into the back of the work to hide it completely.
Repeating the Pattern for the Second Earring
Comparing Motif Size, Stitch Count, and Symmetry
Always count your stitches on the second piece to match the first exactly. Place both motifs side-by-side to compare their diameter and overall shape. Symmetry is the hallmark of high-quality handmade jewelry.
Correcting Uneven Edges Before Assembly
If one piece appears slightly larger or tighter, adjust your tension accordingly. You can gently stretch or manipulate the stitches to align them before moving to the final assembly phase.
| Feature | First Motif | Second Motif | Goal |
|---|---|---|---|
| Stitch Count | 24 Stitches | 24 Stitches | Match Exactly |
| Diameter | 1.5 Inches | 1.5 Inches | Uniform Size |
| Tension | Consistent | Consistent | Balanced Shape |
Blocking, Stiffening, and Assembling the Earrings
Transforming your soft crochet pieces into structured earrings requires a few essential finishing techniques. Proper blocking crochet earrings ensures that each piece maintains a consistent, professional shape before you add any hardware.
Blocking the Crochet Motifs
Pinning the Motifs to Create Matching Shapes
Start by dampening your finished motifs with a light mist of water. Lay them flat on a blocking mat or a piece of foam, then use rust-proof pins to stretch the crochet into the desired symmetry. Precision is key here to ensure both earrings look identical.
Allowing the Pieces to Dry Completely
Leave the pinned motifs in a well-ventilated area until they are bone dry. Removing the pins too early can cause the yarn to lose its shape, so patience is necessary for the best results.

Adding Optional Stiffener
When Stiffening Improves Shape Retention
If you prefer a crisp, rigid look, stiffening crochet is a great option. This process is particularly useful for intricate lace patterns that might otherwise flop or lose their definition during wear.
Applying Stiffener Without Creating a Brittle Finish
Use a fabric-safe stiffening spray or a diluted PVA glue mixture to coat the motifs lightly. Avoid over-saturating the yarn, as this can lead to a stiff, brittle texture that feels uncomfortable against the skin.
Attaching Jump Rings and Ear Wires
Finding the Correct Attachment Point
Identify the top center stitch of your motif to ensure the earring hangs straight. Using a sturdy stitch helps prevent the weight of the hardware from pulling the yarn out of shape.
Opening and Closing Jewelry Rings Without Distorting Them
When you attach ear wires, always use two pairs of pliers to open jump rings. Twist the ends away from each other rather than pulling them apart to maintain the ring’s circular integrity.
Checking Comfort and Security
Testing the Ear Wires and Connections
Give each connection a gentle tug to ensure the jump ring is fully closed. A secure connection prevents the loss of your handmade jewelry during daily activities.
Using Hypoallergenic Findings for Sensitive Ears
Always prioritize comfort by selecting high-quality materials for your hardware. Using hypoallergenic metals like surgical steel or sterling silver helps prevent irritation for those with sensitive skin.
| Material Type | Best For | Durability |
|---|---|---|
| Surgical Steel | Sensitive Skin | High |
| Sterling Silver | Premium Look | Medium |
| Gold Plated | Decorative Use | Low |
Customizing and Caring for Crochet Earrings
Personalizing your handmade jewelry allows you to express your individual style through color and texture. By learning how to modify basic patterns, you can create custom crochet earrings that perfectly match your wardrobe or mood.
Changing Color, Shape, and Size
Using Contrasting Colors for Statement Earrings
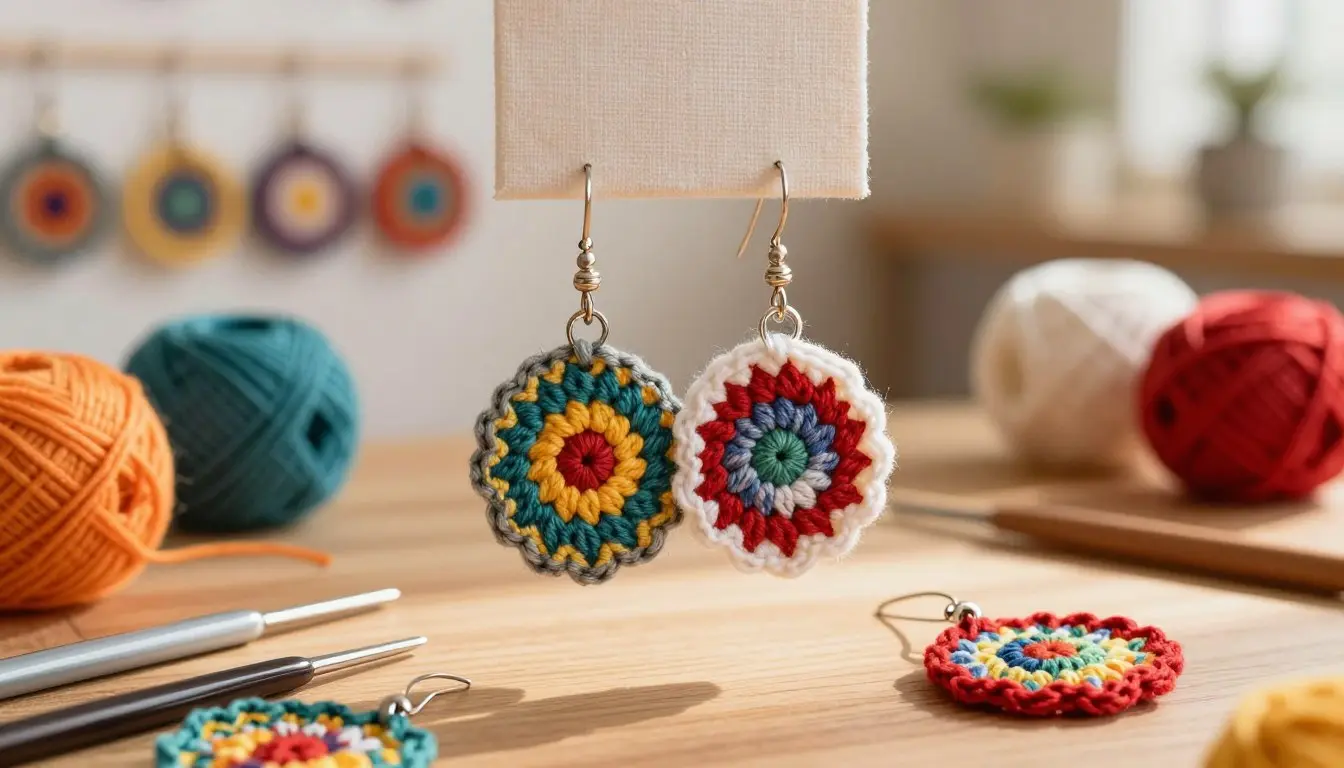
You can easily transform a simple motif by incorporating bold, contrasting yarn colors. Try using a bright shade for the center and a neutral tone for the outer rounds to make the design pop. This simple technique turns a standard pattern into a unique statement piece.
Adjusting Hook Size and Rounds for Different Dimensions
If you want to change the size of your earrings, simply experiment with your tools. Using a larger crochet hook will create a looser, airier motif, while a smaller hook results in a tighter, more delicate look. You can also add or subtract rounds to adjust the final diameter of your work.
Adding Beads and Other Decorative Details
Attaching Lightweight Beads Without Pulling the Motif
Creating crochet earrings with beads adds a touch of elegance and sparkle to your accessories. Always choose lightweight glass or plastic beads to ensure the motif maintains its shape. Heavy beads can pull on the yarn, causing the earring to sag or lose its intended form.
Balancing Embellishments for Comfortable Wear
When adding decorative elements, balance is key to ensuring your jewelry remains comfortable. Distribute beads evenly around the perimeter of the motif to keep the weight centered. This prevents the earring from tilting or feeling lopsided while you wear it.
Cleaning and Storing Handmade Earrings
Protecting Crochet from Moisture, Perfume, and Cosmetics
Proper care for crochet jewelry is essential to keep your pieces looking fresh and vibrant. Always apply perfumes, hairsprays, and lotions before putting on your earrings to avoid staining or damaging the fibers. Moisture can also weaken the stiffener, so remove your jewelry before swimming or showering.
Storing Motifs Flat to Prevent Creasing
To maintain the shape of your handmade items, store them carefully when they are not in use. Always keep your motifs flat in a jewelry box or a dedicated organizer to prevent unwanted creases. Following these simple steps for care for crochet jewelry will ensure your crochet earrings with beads last for years to come.
- Keep earrings away from direct sunlight to prevent fading.
- Use a soft, dry cloth to gently wipe away dust.
- Store in a cool, dry place to avoid humidity damage.
Conclusion
Creating your own accessories offers a rewarding way to express personal style. This crochet earring tutorial provides the foundation needed to produce professional results with simple materials.
Focusing on consistent motif tension ensures your easy crochet earrings look polished and symmetrical. Proper blocking and secure assembly techniques protect your hard work while keeping the pieces comfortable for daily wear.
You now possess the knowledge to experiment with different yarn weights and vibrant color palettes. These DIY earrings serve as a perfect canvas for your creative vision. Incorporate beads or unique findings to make each pair distinct.
Proper storage keeps your handmade items in excellent condition for years. Share your finished designs with friends or keep them as staples in your own jewelry collection. Your journey into fiber arts starts with these small, beautiful projects.
FAQ
What is the best type of yarn to use for the FREE Crochet Earrings Pattern?
For a professional and lightweight finish, it is highly recommended to use a lightweight cotton thread, such as Aunt Lydia’s Classic 10. Using a fine yarn ensures that the crochet earring motifs remain delicate and do not pull on the earlobe. Pair this with a small Clover Amour Crochet Hook (typically 1.25mm to 1.5mm) to achieve tight, crisp stitches.
How do I ensure my handmade earrings are safe for sensitive skin?
To prevent irritation, always choose hypoallergenic findings. Look for ear wires and jump rings made from Sterling Silver, Niobium, or surgical-grade stainless steel. Brands like Beadalon offer a variety of high-quality, nickel-free components that are perfect for DIY accessory designs.
What tools are necessary for assembling the jewelry hardware?
To attach your crochet motifs to the earring findings, you will need a pair of jewelry pliers, specifically chain-nose pliers. These allow you to open and close jump rings with precision without distorting the metal. You will also need a tapestry needle to weave in your yarn tails securely for a clean look.
How can I keep the crochet motifs from curling or losing their shape?
The most effective method is blocking. Pin your damp motifs to a blocking mat using rust-proof pins and let them dry completely. For added durability and shape retention, you can apply a fabric stiffener like Aleene’s Stiffen Quik. This ensures your wearable crochet jewelry stays flat and maintains its definition during wear.
What crochet stitches do I need to know to complete this project?
This pattern uses standard American crochet abbreviations. You should be comfortable with the chain (ch), slip stitch (sl st), single crochet (sc), and double crochet (dc). The instructions also involve increasing and joining rounds to create the foundation ring and decorative openwork shape.
How do I make sure both earrings in the pair are the same size?
Consistency is key to matching motifs. Try to maintain even yarn tension throughout the project and complete both earrings in one sitting if possible. Use stitch markers to keep track of your rounds and count your stitches carefully on the second earring to ensure symmetry before you begin the assembly process.
Can I customize the design with beads or different colors?
Absolutely. You can create statement earrings by using contrasting colors or by threading lightweight seed beads onto your thread before you start. Just ensure the embellishments are not too heavy, as excessive weight can cause the crochet motif to sag or become uncomfortable for everyday wear.
What is the best way to clean and store my crochet jewelry?
To preserve your handmade accessory project, protect it from moisture, perfume, and cosmetics, which can discolor the thread. If they get dirty, spot clean gently with a damp cloth. Store your earrings flat in a dedicated jewelry box to prevent creasing and maintain the blocked shape.