Free Crochet Baby Boot Pattern + Video | Easy Panda Embroidery Design
The tutorial video is at the bottom of the article.👇
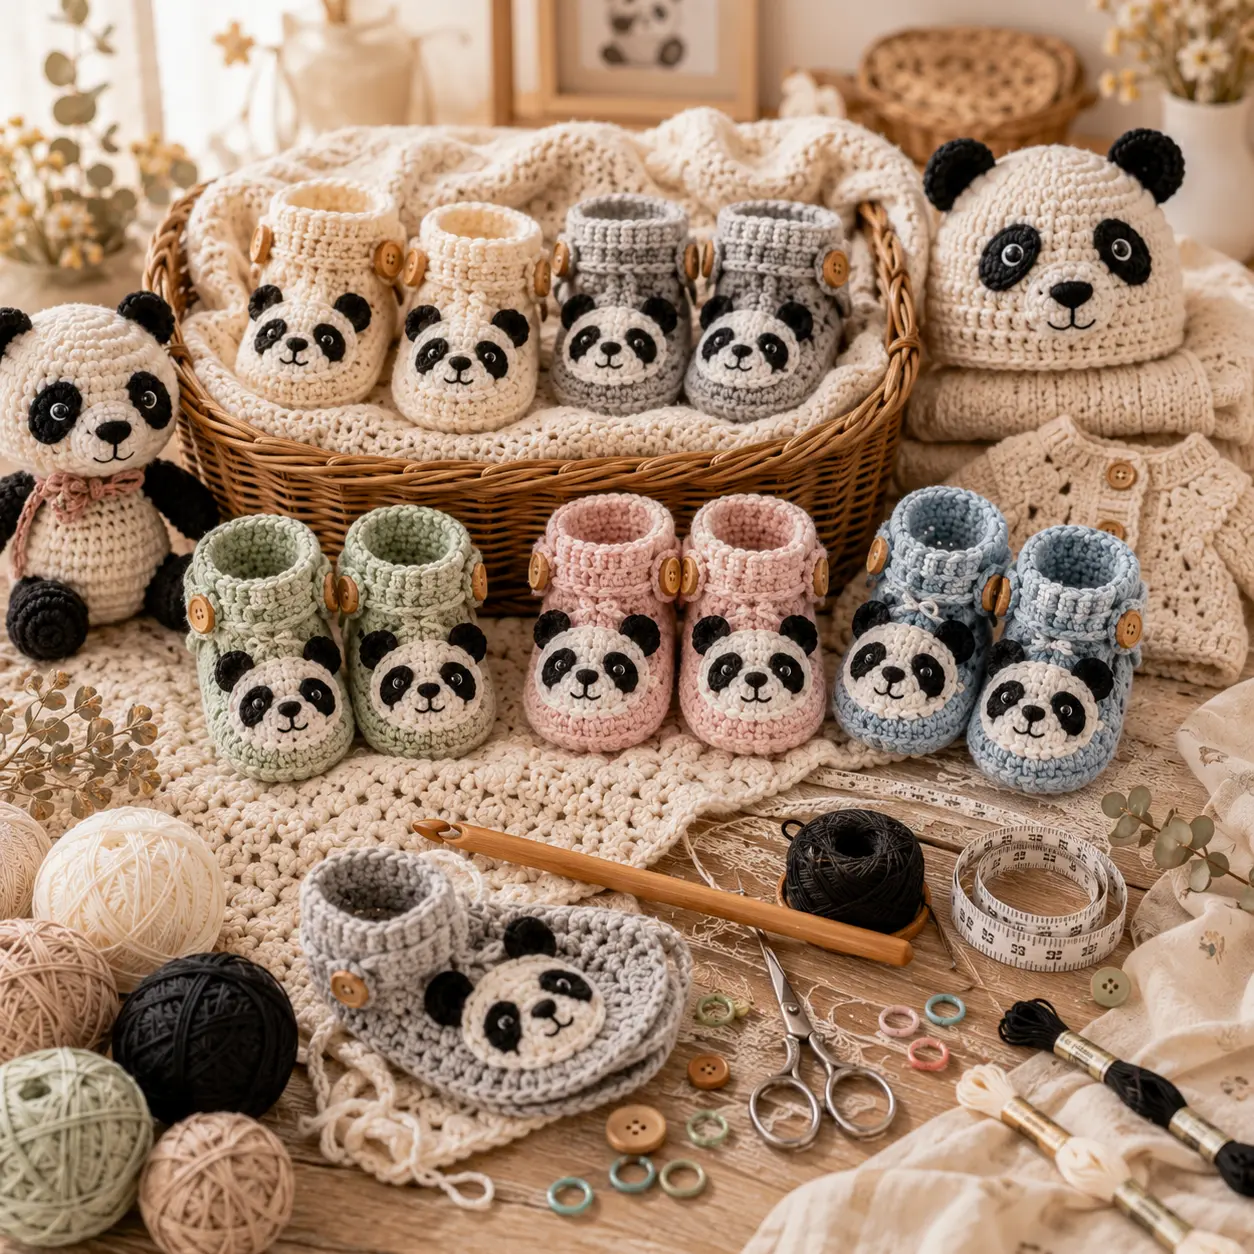
Baby boots have a way of looking far more advanced than they actually are, especially once you add a playful embroidered detail like a little panda face. This free crochet baby boot pattern builds a taller, cozier boot shape than a basic bootie, then finishes it off with a simple panda embroidery design that’s easier to create than it looks.
A companion video walks through the trickier embroidery steps, so even if you’ve never added a face design to a project before, you’ll finish with boots that look ready for a boutique shelf.
Why This Panda Embroidery Baby Boot Is Worth Making
Taller boots offer more ankle coverage and warmth than a basic baby shoe, making them ideal for cooler months or as a going-home outfit accessory. The panda embroidery adds personality without requiring any extra crocheted pieces, since it’s worked directly onto the finished boot.
What makes this pattern worth your time:
- Taller boot shape offers extra warmth and coverage
- Embroidery is simpler and faster than a crocheted applique
- Soft yarn keeps tiny feet comfortable
- A sweet, giftable design perfect for baby showers
What You’ll Need: Materials Table
Gather these supplies before starting so your video-guided session goes smoothly from start to finish.
| Item | Recommended Type | Approximate Amount |
|---|---|---|
| Yarn (Main, black and white) | Soft baby yarn, cotton or acrylic blend | 40-50g total |
| Embroidery yarn or thread | Black, for facial details | Small amount |
| Crochet hook | 3mm-3.5mm (US C/2-E/4) | 1 |
| Yarn needle | Blunt tip | 1 |
| Embroidery needle | Sharp, fine point | 1 |
| Stitch markers | Optional, for tracking rounds | 1-2 |
Working the boot in white with black patches mimics a panda’s coloring naturally, which means less embroidery work is needed to bring the design to life.
Sizing Guide
Baby feet grow fast, so check the sole length against the baby directly if you have the chance before finishing.
| Age | Sole Length (approx.) | Boot Height (approx.) |
|---|---|---|
| Newborn (0-3 months) | 3.5 inches | 2.5 inches |
| 3-6 months | 4 inches | 3 inches |
| 6-12 months | 4.5 inches | 3.5 inches |
If the finished sole runs larger or smaller than expected, adjust your hook size on your next pair rather than changing the stitch count.
Step-by-Step: How to Crochet the Baby Boot
Step 1: Crochet the Sole
- Start with a magic ring or chain 11 in white yarn.
- Single crochet around the chain, working 3 stitches into the last chain to turn the corner.
- Continue single crocheting up the other side, then join with a slip stitch.
- Repeat for 2-3 rounds, increasing evenly to keep the sole flat.
Step 2: Build the Taller Boot Sides
- Switch to working in rounds without further increasing
- Work single crochet in the back loops only for a defined, structured edge
- Continue for 6-8 rounds to achieve the taller boot height, switching to black yarn partway up if you want a two-tone panda look
- Reference the video here for a visual guide on where to place your color change for the panda effect
Step 3: Shape the Ankle and Close the Top
- Decrease evenly around the top opening to narrow toward the ankle.
- Fasten off, leaving a tail for seaming if needed.
- Add a small tie, button strap, or fold-over cuff for a secure, finished look.
How to Add the Panda Embroidery Design
Step 4: Place the Eye Patches
- Using black yarn, embroider two rounded oval shapes on the front of the boot for the panda’s signature eye patches.
- Keep the patches angled slightly upward for a classic panda expression.
- Fill each patch with satin stitch for a solid, clean look.
Step 5: Add the Final Details
- Embroider two small black dots inside the eye patches for the pupils
- Add a small black oval below the eyes for the nose
- Use a few straight stitches to create a simple mouth
- Watch the video tutorial if you want a visual reference for spacing the panda features evenly
Tips for a Clean, Adorable Finish
- Lightly sketch the panda placement with a fabric pen before embroidering, if you’re new to embroidery
- Keep your embroidery stitches loose enough not to pucker the crocheted fabric
- Use the video to double-check spacing before committing to the final stitches
- Weave in every yarn tail as you go so nothing unravels with wear
Common Mistakes to Avoid
- Skipping the gauge check — sole size is the most common fit issue in baby boots
- Pulling embroidery too tight — puckers the crocheted fabric and distorts the design
- Uneven eye patch placement — throws off the panda’s expression noticeably
- Rushing the color change — an uneven transition can make the two-tone effect look messy
Frequently Asked Questions
Is there a video for this crochet baby boot pattern? Yes, the companion video walks through the taller boot shaping and the panda embroidery placement step by step.
What yarn works best for the panda embroidery design? A smooth, soft baby yarn in black and white works best, since it mimics natural panda coloring and keeps stitch definition clean for the embroidery.
What hook size should I use for crochet baby boots? A 3mm to 3.5mm hook pairs well with fine baby yarn to create a snug sole and well-shaped boot sides.
How long does it take to make a pair of these baby boots? Most crocheters finish the boots and embroidery together in about 3 to 4 hours.
Can I use this pattern with a different animal design instead of a panda? Yes — the boot construction stays the same, so you can swap the embroidery colors and shapes to create bears, foxes, or any design you like.
Conclusion
This crochet baby boot pattern with panda embroidery combines a cozy, taller boot shape with a sweet, giftable design detail that’s simpler to achieve than it looks. With the materials list, sizing guide, and step-by-step instructions above — plus the companion video for the embroidery placement — you have everything you need to make a pair that stands out at any baby shower.
Grab your yarn, start your first sole today, and follow along with the video when you reach the embroidery steps. Once your boots are finished, share them with your crochet community — a panda design this sweet is always worth showing off.