Ultimate Granny Square Crochet Balaclava – Free Pattern & Video Tutorial
The tutorial video is at the bottom of the article.👇
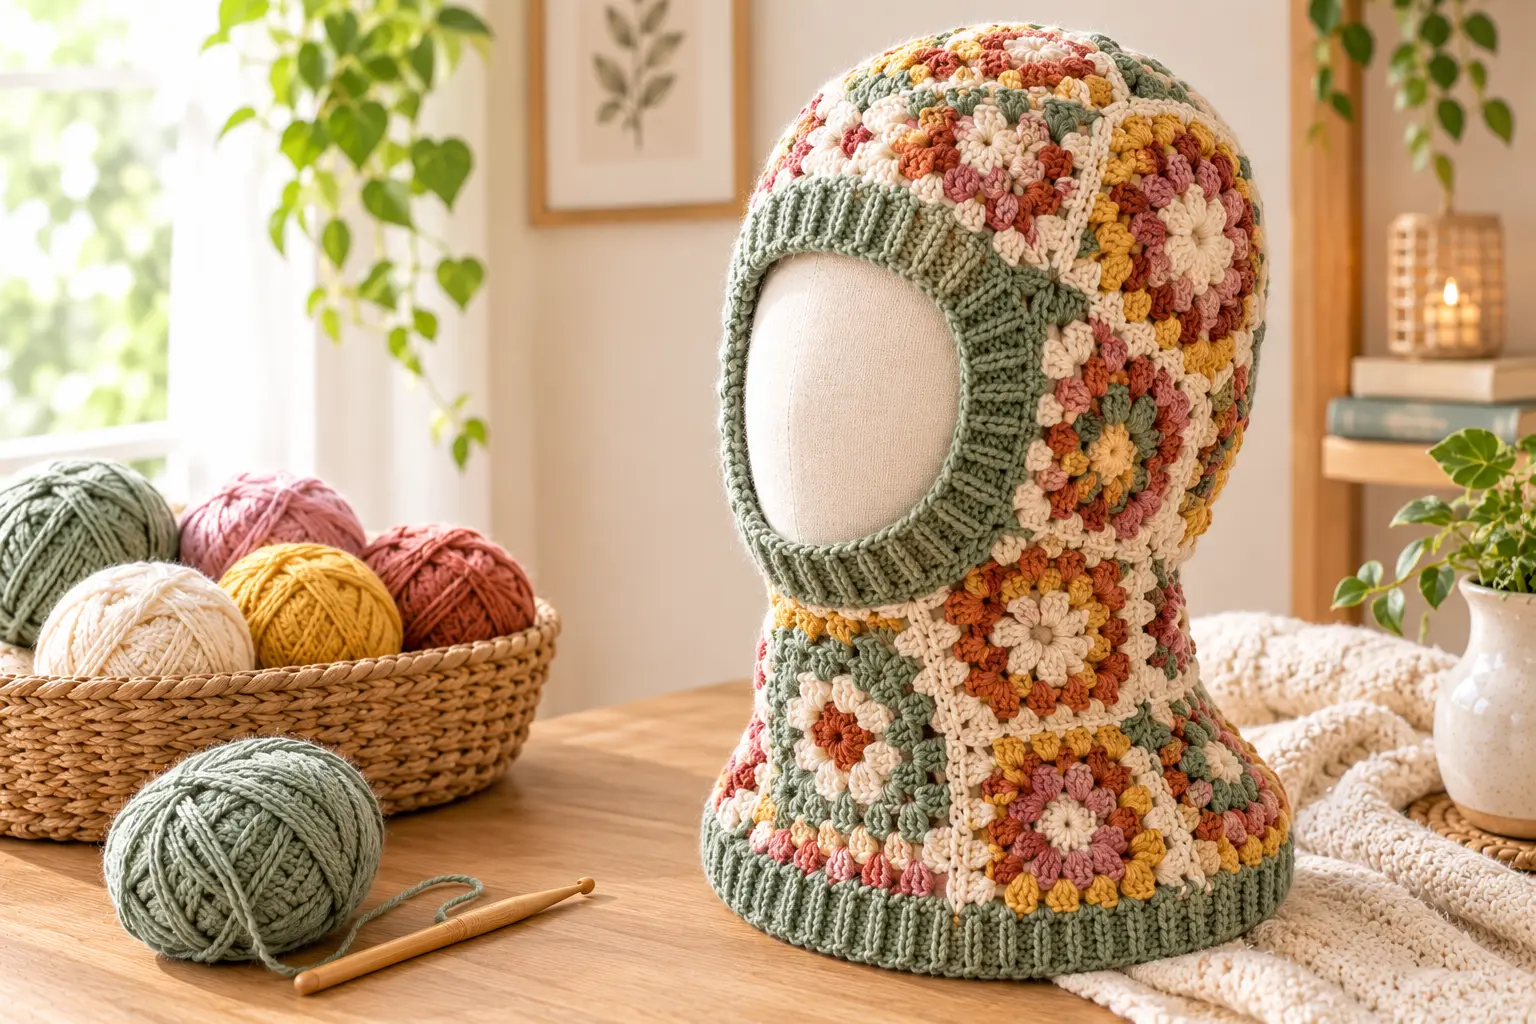
When the weather gets chilly, a cozy handmade accessory can make getting dressed a little more enjoyable. If you love colorful crochet projects with a vintage touch, a granny square crochet balaclava is a fun way to combine creativity and comfort. Its geometric motifs give a classic winter hood a fresh look, while your choice of yarn and colors makes every finished piece unique.
Whether you’re crocheting for yourself or making a thoughtful handmade gift, this project lets you turn simple granny squares into a distinctive cold-weather accessory. You can experiment with bold color combinations, use leftover yarn, and customize the finished design to match your wardrobe.
In this guide, you’ll discover the materials, crochet techniques, assembly tips, and finishing ideas you’ll need. Follow a tested written pattern alongside the video tutorial to create a granny square balaclava that suits your personal style.
Why You’ll Love This Granny Square Crochet Balaclava
A crochet granny square balaclava combines traditional crochet motifs with a modern accessory. It’s a creative project that allows you to practice familiar stitches while learning how individual pieces fit together.
Here are a few reasons to try it:
- Colorful and unique: Create anything from a neutral, understated design to a bright, retro-inspired accessory.
- A practical winter project: A well-fitting balaclava can cover your head and neck, depending on its construction.
- Great for using leftover yarn: Combine compatible yarn scraps to create a coordinated patchwork effect.
- Customizable: Experiment with square colors, edging, and the overall fit.
- A thoughtful handmade gift: Make a personalized accessory for someone who appreciates crochet.
This project is especially appealing if you enjoy making granny squares but want to use them for something beyond blankets, bags, or cushions.
Granny Square Crochet Balaclava Pattern Overview
Before you begin, review the pattern’s construction and sizing information.
| Pattern Detail | Information |
|---|---|
| Project | Granny square crochet balaclava |
| Skill level | Confident beginner to intermediate, depending on construction |
| Main technique | Crocheting and joining granny squares |
| Additional techniques | Shaping, edging, and weaving in ends |
| Yarn | Weight and quantity specified by the pattern |
| Hook | Size recommended by the designer |
| Fit | Based on head measurements and finished dimensions |
| Pattern format | Written instructions and video tutorial |
The exact number of squares and their arrangement depend on the design. Check the pattern’s layout diagram before making all your motifs, so you know the dimensions and construction will work together.
Materials You’ll Need
Gather your supplies before starting your granny square crochet balaclava.
| Material | Quantity or Details | Purpose |
|---|---|---|
| Yarn | Exact amount listed in the pattern | Creates the granny squares and finishing details |
| Crochet hook | Recommended pattern size | Helps achieve the correct gauge |
| Scissors | One pair | Cuts yarn neatly |
| Tapestry needle | One | Weaves in ends and helps with assembly |
| Stitch markers | As needed | Marks important points during construction |
| Measuring tape | One | Checks head measurements and motif dimensions |
| Blocking tools | Optional | Helps shape squares evenly when suitable for the yarn |
Choosing the Best Yarn
Your yarn choice affects the balaclava’s warmth, softness, drape, and overall appearance.
- Wool or wool blends: Often suitable for cozy cold-weather accessories.
- Acrylic yarn: Available in many colors and may be easier to maintain.
- Soft yarn blends: Can be comfortable around the forehead, cheeks, and neck.
Choose a yarn that feels pleasant against your skin. If you’re using leftover yarn, try to keep the weights and fiber properties reasonably compatible. Significant differences can cause your granny squares to vary in size or stretch.
Always check the yarn label for care instructions before washing or blocking your finished project.
Crochet Stitches and Techniques You’ll Need
Most granny square designs use a small collection of familiar stitches. Your chosen pattern should explain its abbreviations before the instructions begin.
Common abbreviations include:
- ch: Chain
- sl st: Slip stitch
- sc: Single crochet
- dc: Double crochet
- st(s): Stitch or stitches
- sp: Space
- rep: Repeat
How to Crochet a Basic Granny Square
A traditional granny square is usually built outward from a central ring.
- Create the center using the method specified in your pattern.
- Work the first round of stitch groups and chain spaces.
- Form the corners using the required stitch groups or chain spaces.
- Continue adding rounds until the square reaches the specified dimensions.
- Fasten off and weave in the loose ends.
Keep your tension consistent so every square is similar in size. If your design uses several colors, plan the sequence before beginning to make color changes easier to manage.
Joining Your Granny Squares
Your joining method influences both the appearance and flexibility of the finished balaclava. Common options include slip-stitch joins, single-crochet joins, and sewn seams.
Follow the method specified by your pattern. Align the corners carefully, keep the seams even, and avoid pulling the yarn too tightly. A bulky or rigid seam may feel uncomfortable when the hood rests against your head.
How to Crochet a Granny Square Balaclava Step by Step
The general process involves creating the motifs, arranging them, joining the pieces, and finishing the edges. Use the exact stitch counts, motif layout, and assembly instructions from your tested pattern.
Step 1: Measure Your Head and Plan the Fit
Measure around your head and compare the result with the pattern’s sizing information. Check the intended face opening and any neck coverage included in the design.
Comfort matters here. The opening should fit securely without pulling uncomfortably around your forehead or cheeks.
Step 2: Crochet the Granny Squares
Make the required number of squares, following the pattern’s instructions for each round.
As you work:
- Count stitches and rounds.
- Check the dimensions of each completed square.
- Keep your tension consistent.
- Weave in ends as you go if this suits your construction method.
Measure the first square before continuing. Correcting a gauge problem early is easier than adjusting a whole collection of motifs later.
Step 3: Arrange the Squares
Lay your finished squares on a flat surface and arrange them according to the pattern’s assembly diagram.
Experiment with color placement before joining anything. Check the orientation of each motif and confirm that the pieces form the intended hood shape.
Step 4: Join the Squares
Join the motifs using the recommended technique. Match corners and edges carefully, and maintain even tension along each seam.
Take your time during this stage. Neat joins help the balaclava keep its shape and give the finished project a more polished appearance.
Step 5: Shape the Hood and Face Opening
Follow the pattern to assemble the hood and form its opening. Depending on the design, you may need additional shaping or a separate neck section.
Try the balaclava on before completing the edging, if the construction allows. Check that it sits comfortably and doesn’t restrict movement.
Step 6: Add the Edging and Finish
Work the specified border around the face opening and any other unfinished edges. Fasten off and weave in loose ends securely.
If your yarn permits blocking, follow the manufacturer’s care guidance and reshape the motifs gently. Avoid using heat or moisture methods that could damage the fiber.
Granny Square Crochet Balaclava Video Tutorial
A video tutorial can be especially useful when you’re learning how to join motifs or assemble the hood. Watching each stage can help you understand how the pieces fit together.
For the best results:
- Read the written instructions before starting.
- Watch the relevant section of the video.
- Pause while you complete the same steps.
- Replay any unfamiliar technique.
- Compare your work with the pattern’s measurements.
Add the actual video tutorial here before publishing. Make sure the video demonstrates the same square design, joining method, and assembly as the written pattern.
Easy Ways to Customize Your Crochet Balaclava
One of the best parts of making your own granny square crochet balaclava is choosing the details.
- Classic neutrals: Combine cream, brown, beige, or gray for a subtle look.
- Retro colors: Try mustard, rust, olive, and burgundy for a vintage-inspired palette.
- Pastel combinations: Use soft pink, lavender, blue, and cream for a gentler appearance.
- Scrap-yarn designs: Arrange compatible leftover yarns into colorful motifs.
- Decorative edging: Add a contrasting border if the pattern allows it.
You can also experiment with the size of the squares, but changes may affect the overall fit and construction. Follow the pattern’s sizing guidance when adjusting dimensions.
Common Granny Square Crochet Balaclava Problems
Why are my granny squares different sizes?
Your tension, hook size, or yarn weight may vary. Check your gauge and measure each square before joining.
Why do my seams look uneven?
Make sure the corners align and use the same joining method throughout. Keep your tension consistent without tightening the yarn excessively.
Why is the face opening too tight?
Check the opening’s measurements and the edging instructions. Avoid finishing stitches that pull the fabric inward.
Can I use different yarn scraps?
Yes, provided the yarns create compatible fabric and similar motif dimensions. Mixing very different weights can affect the final fit.
How to Care for Your Handmade Balaclava
Follow the washing and drying instructions on your yarn label. Some fibers tolerate gentle hand-washing, while others require special care.
After washing, reshape your balaclava gently if appropriate for the yarn. Let it dry according to the manufacturer’s recommendations and store it somewhere clean and dry.
Frequently Asked Questions
Is a Granny Square Crochet Balaclava Suitable for Beginners?
It can be suitable for confident beginners who know basic stitches and are comfortable joining crochet pieces. The difficulty depends on the motif pattern and the shaping required.
How Many Granny Squares Do You Need for a Crochet Balaclava?
The number depends on the size of each square, the intended fit, and the hood’s construction. Follow the pattern’s layout diagram rather than relying on a generic square count.
What Is the Best Yarn for a Granny Square Crochet Balaclava?
Wool, acrylic, and suitable blends can all work. Choose a yarn that feels comfortable against your skin and creates fabric with appropriate warmth and flexibility.
Can You Make a Granny Square Balaclava With Scrap Yarn?
Yes. Compatible scraps can create an attractive patchwork design. Keep the yarn weights and square dimensions consistent for easier assembly.
Is a Crochet Granny Square Balaclava Warm?
Its warmth depends on the yarn, stitch density, fit, and coverage. A close-fitting design made with a suitable winter yarn may provide useful insulation, but it isn’t a substitute for specialized protective gear in severe weather.
Create Your Own Granny Square Crochet Balaclava
A granny square crochet balaclava is a creative way to turn classic crochet motifs into a distinctive winter accessory. With thoughtful color choices, consistent squares, and careful joining, you can make a piece that feels personal and looks different from anything you’d find in a store.
Gather your yarn, choose your favorite color palette, and follow the written instructions alongside the video tutorial. Take your time with the assembly, check the fit before finishing, and enjoy watching your project come together.
Ready to start crocheting? Save this pattern for your next project, share your favorite color combinations in the comments, and explore more handmade inspiration at www.crochetwhisper.com. Your next favorite winter accessory could begin with a few simple granny squares!